
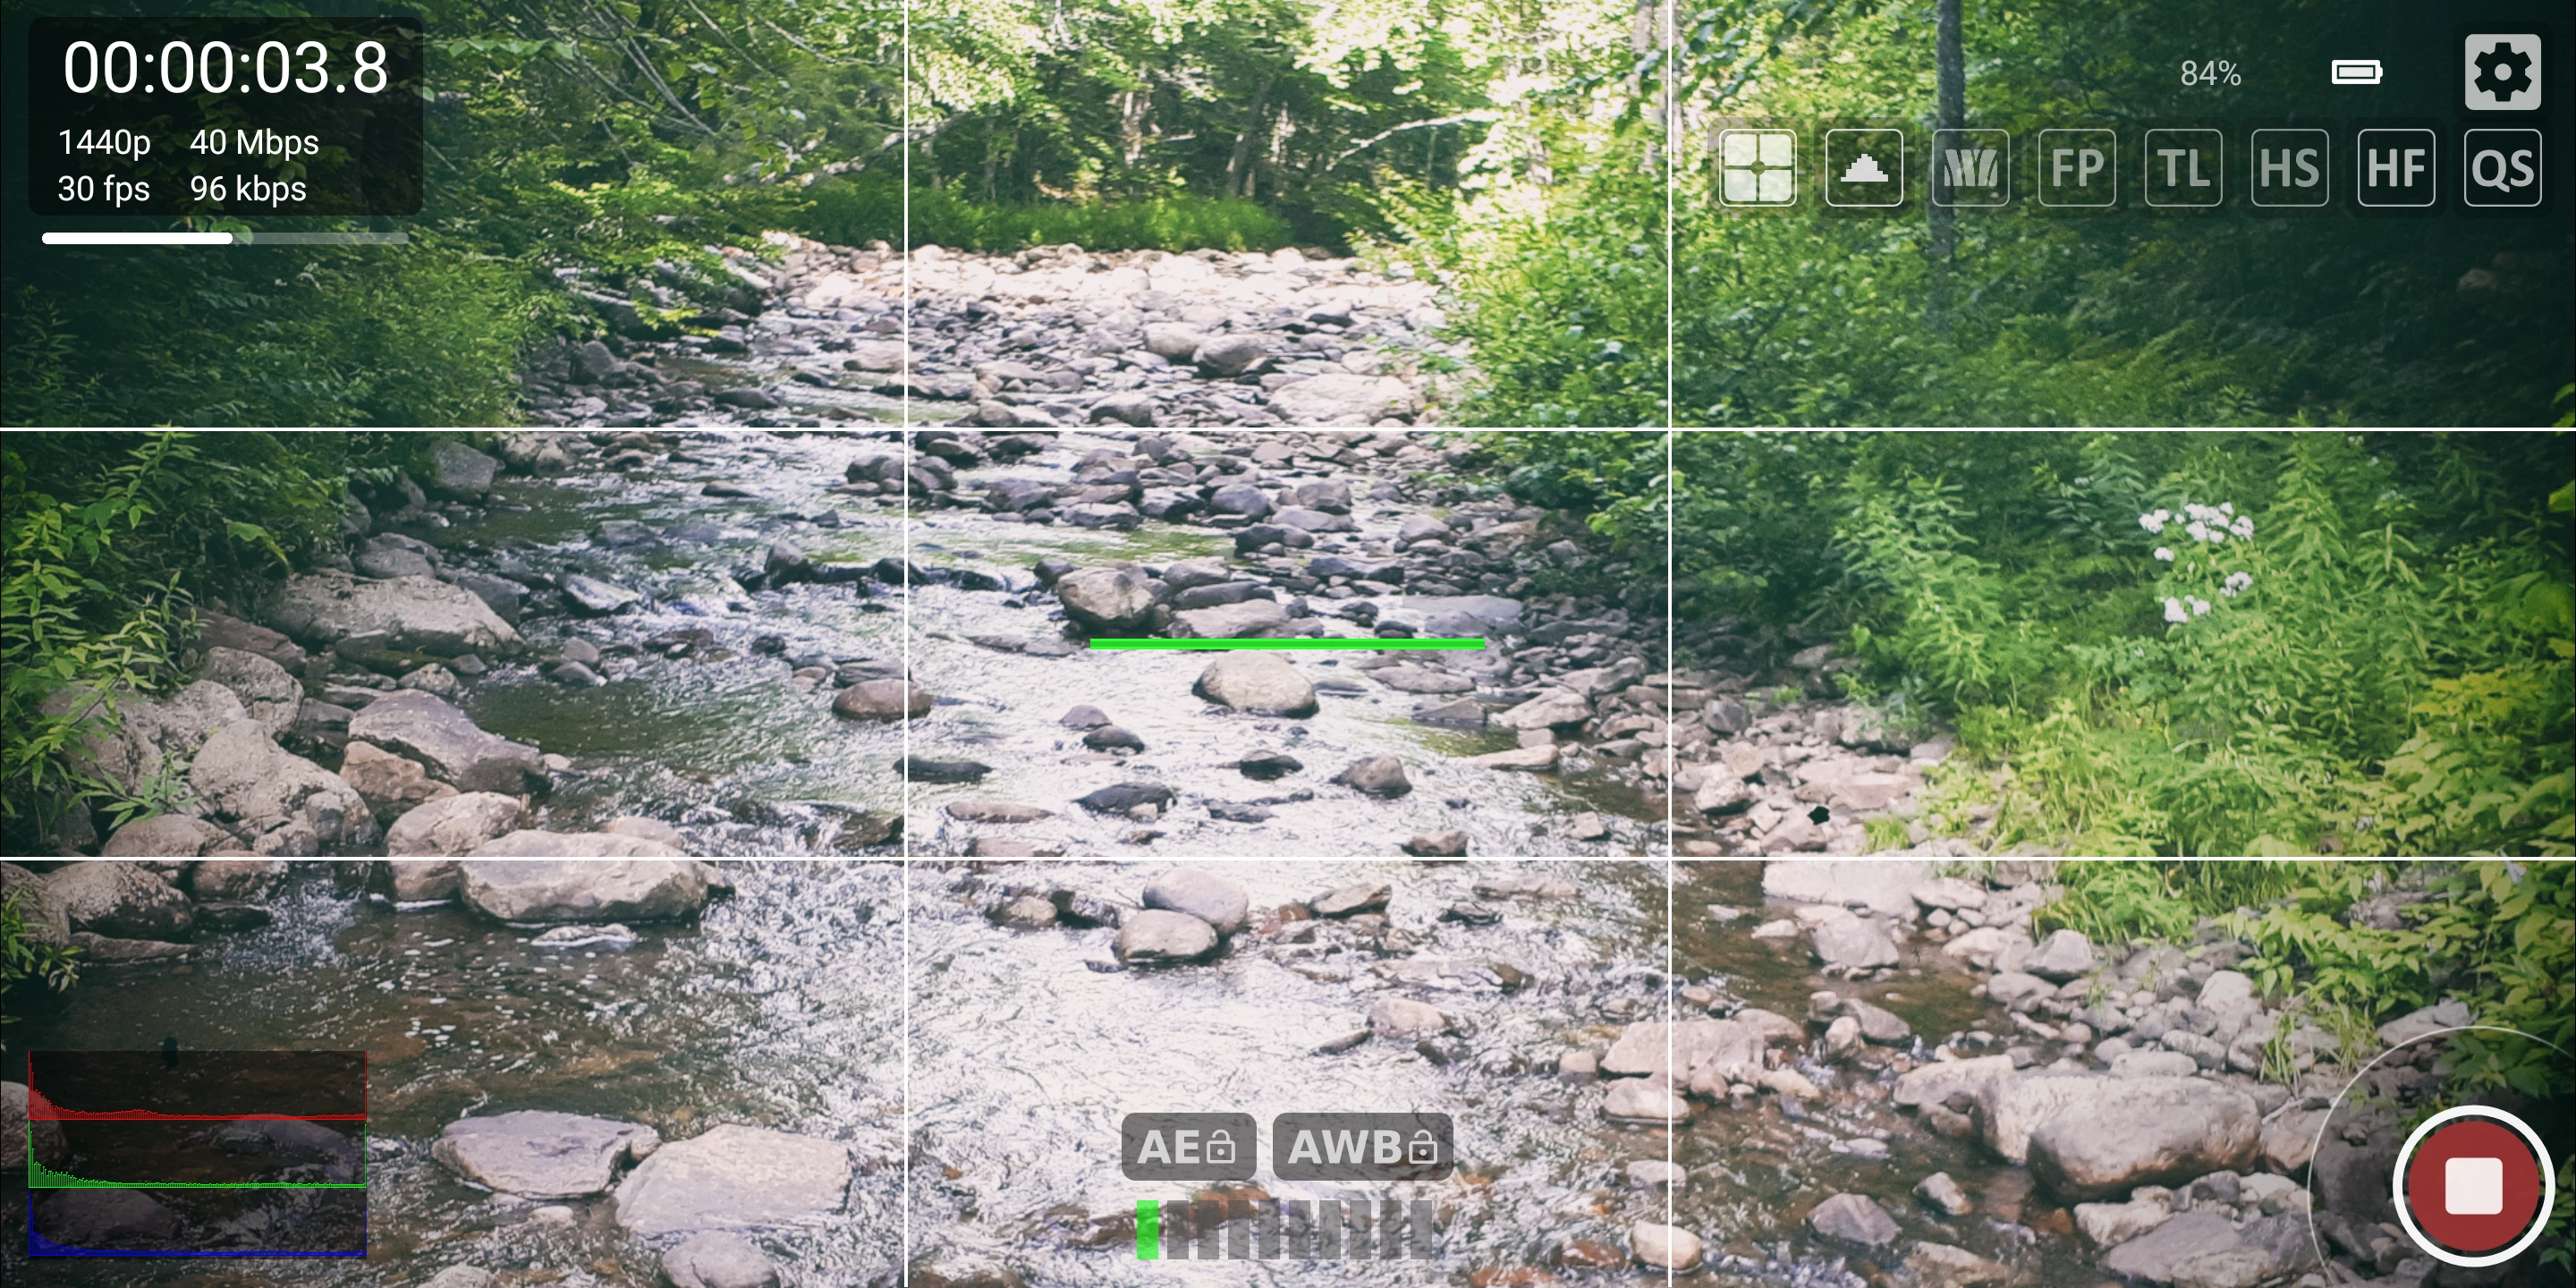
On starting CK47 Pro for the first the primary display which will show the camera preview in the background as well as the audio monitor display, the battery indicator (both text percentage as well as visible icon), the pre-settings button, and finally the video recording button which starts and stops video recording. Other optional buttons and information displays can be toggle on and off from those shown in the above image.
The battery indicator can toggled to be text and/or icon only, or both or be removed completely with the application settings menu which is accessible in the pre-setting display. The SF or HF button allows access to software or hardware filters depending on what features are support by your device.
Note that long pressing the metering button while in spot metering mode will cause the button to turn red indicating that you can select where the spot metering will occur in the scene. Once in selection mode pressing anywhere on the screen will use that area as the metering area.

The following displays all the of primary display items that can be found if all options are turned on.
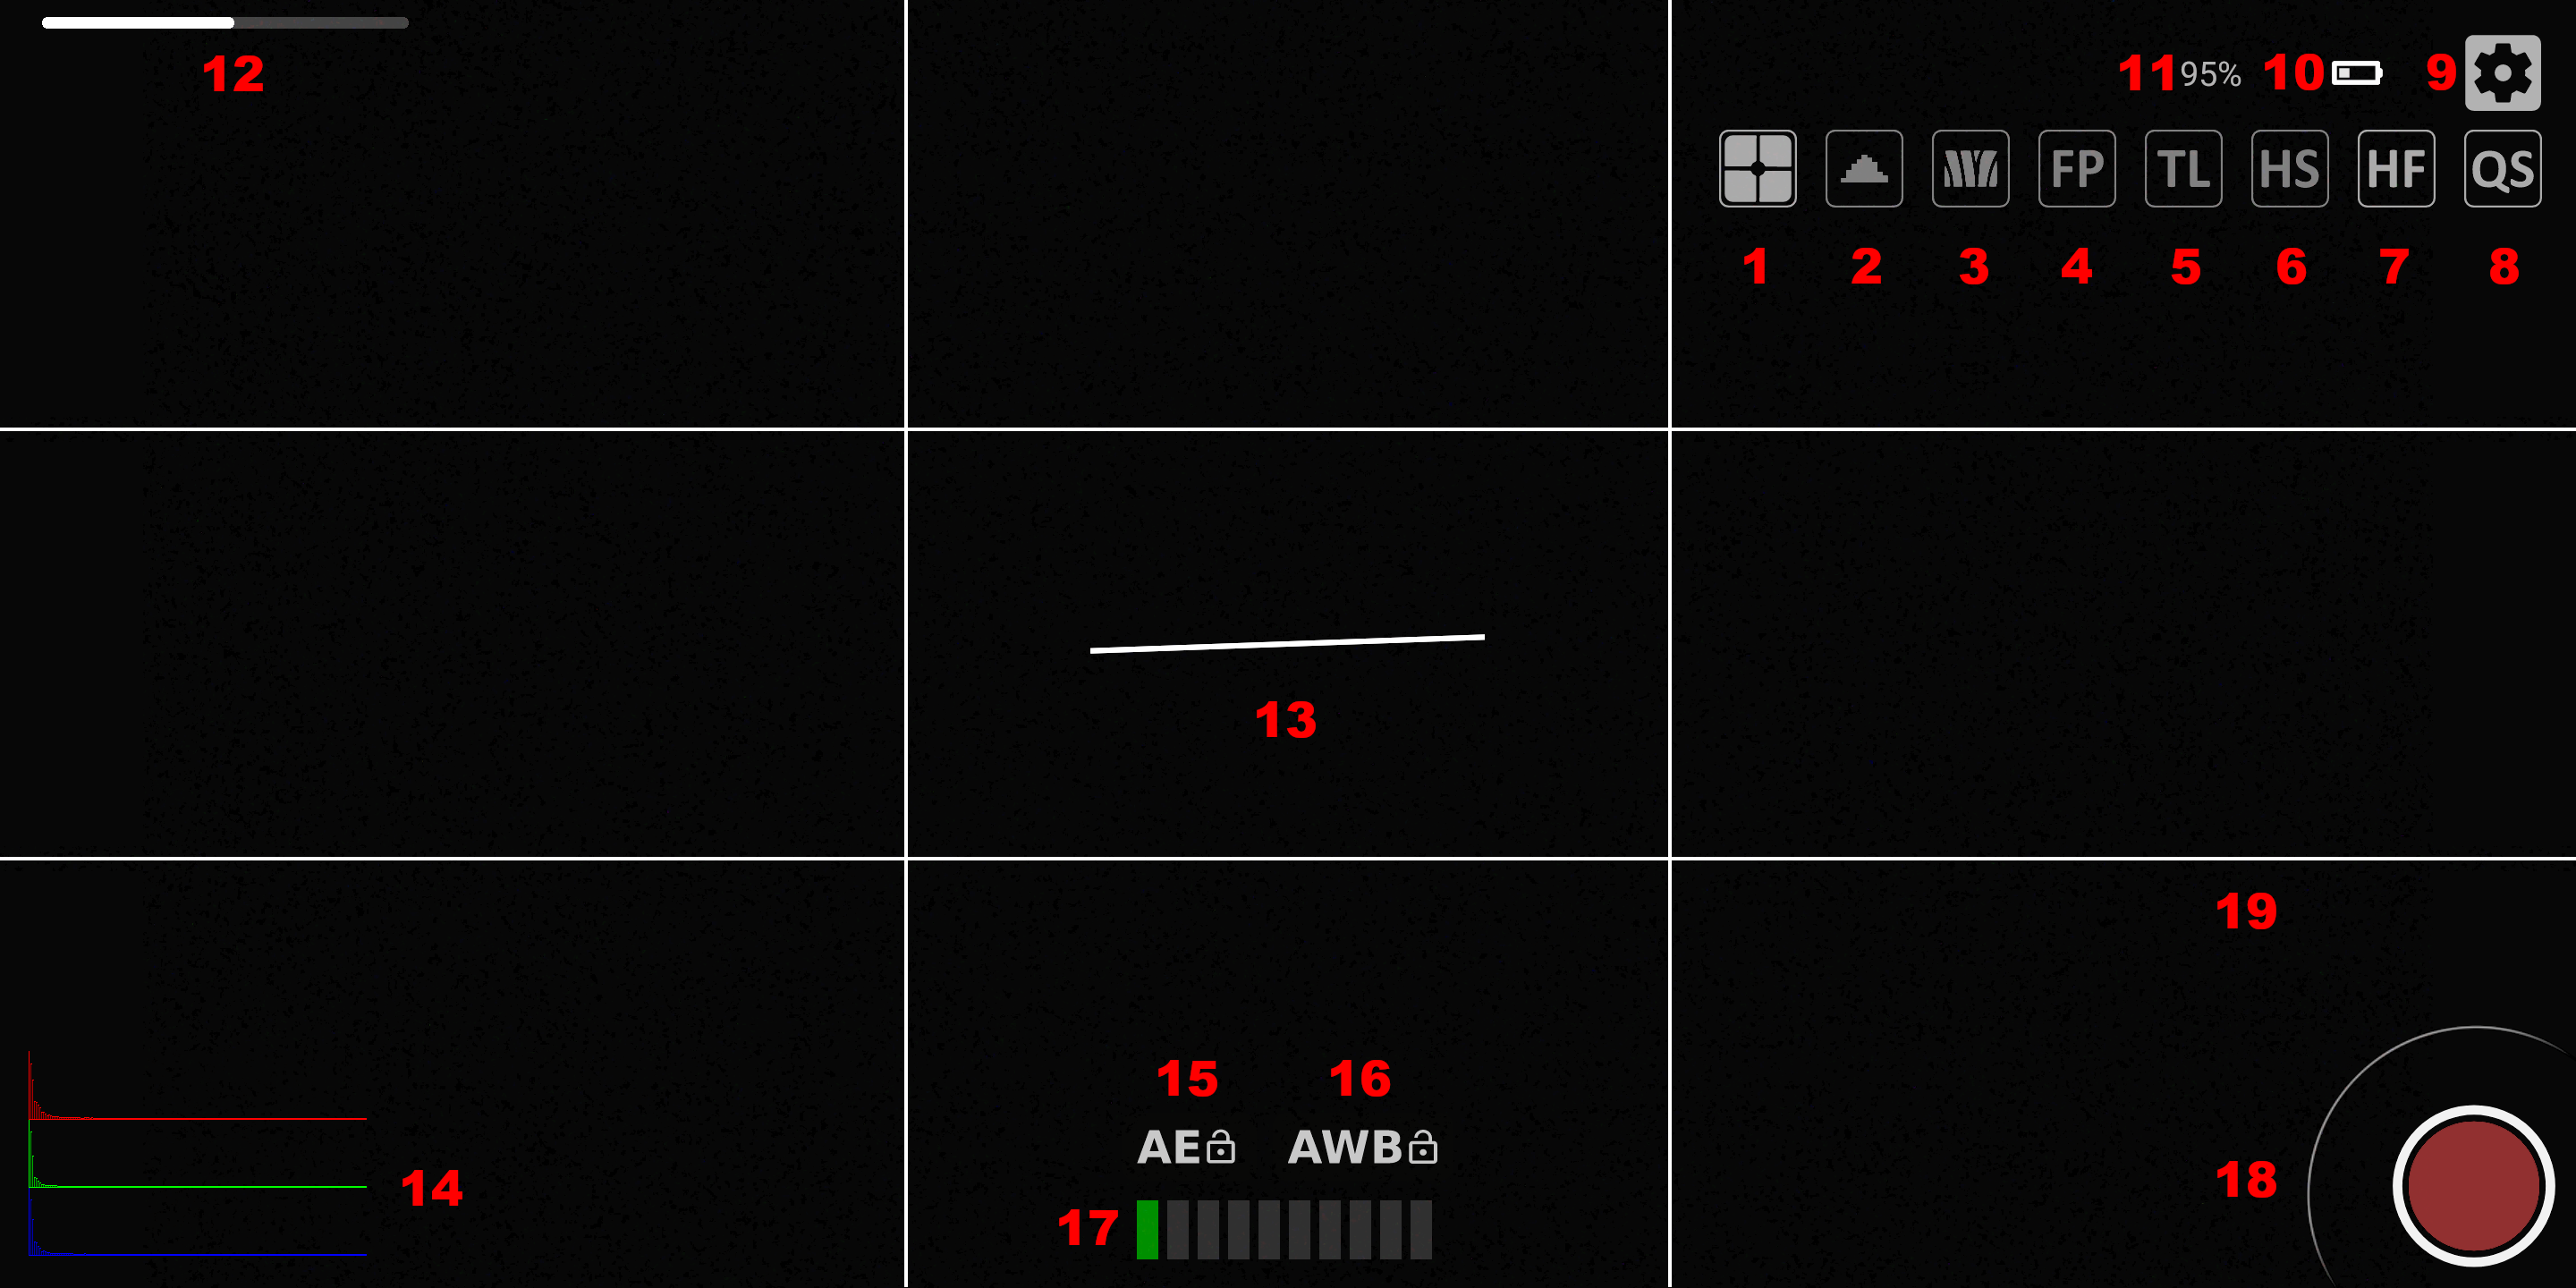
- Metering selection button. (optional)
- Histogram selection button. (optional)
- Zebra selection button. (optional)
- Focus peak selection button. (optional)
- Time lapse recording mode selection button.
- High-speed recording mode selection button. (hardware dependent)
- Software or Hardware selection panel toggle button. (hardware dependent)
- Quick setting selection panel toggle button.
- Pre-setting menu button.
- Icon battery indicator (< 33% = red, < 66% = yellow, < 99% = green, 100% = white, charging flashes white indicator).
- Text battery indicator. (optional)
- Free file space indicator. (optional)
- Level indicator. (optional)
- Histogram. (optional)
- AE lock indicator button. (hardware dependent)
- AWB lock indicator button. (hardware dependent)
- Audio monitor display bar (can be a LED display or full bar display). (optional)
- Start / Stop recording button.
- Grid overlay. (optional)
- Crop overlay. (optional, unseen due to test screen)
Regular recording information displays as follows :
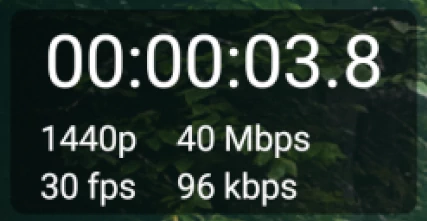
The display shows the elapsed recording time, resolution and frame rate on the left, and recording bitrates for video top and audio bottom.
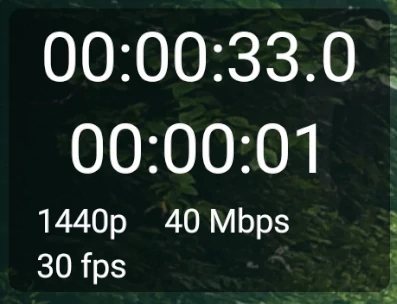
When using timelapse recording mode the information will be similar to the regular recording mode with the addition of estimated actual recorded time. Note that no audio is recorded in timelapse as such no bitrate data will be displayed. See the image below for reference:
Note that some of the button and options shown above need to be enabled or selected in the corresponding settings menu option.
Also note that some of the buttons have other actions available when long pressing them.
For example long pressing the histogram button when the histogram mode is enabled will disable the histogram.
Another example of this is when in center spot metering mode long pressing the metering button will enter selection mode (the button will show red) for where to spot metering the scene from similar to how touch focus works, once selected this will revert back to normal operations (the icon will show as regular white icon). To select a new metering spot will once again require long pressing and repeating the same operation just described.