

CK47 Pro tries to avoid screen clutter by moving most of its controls to the pre-settings display screen and supports left and right handedness settings buttons.
From this screen you can control the camera, microphone, light, level indicator, grid & aspect markers, manual focus settings, manual exposure settings, manual white balance settings, and manual zoom control.
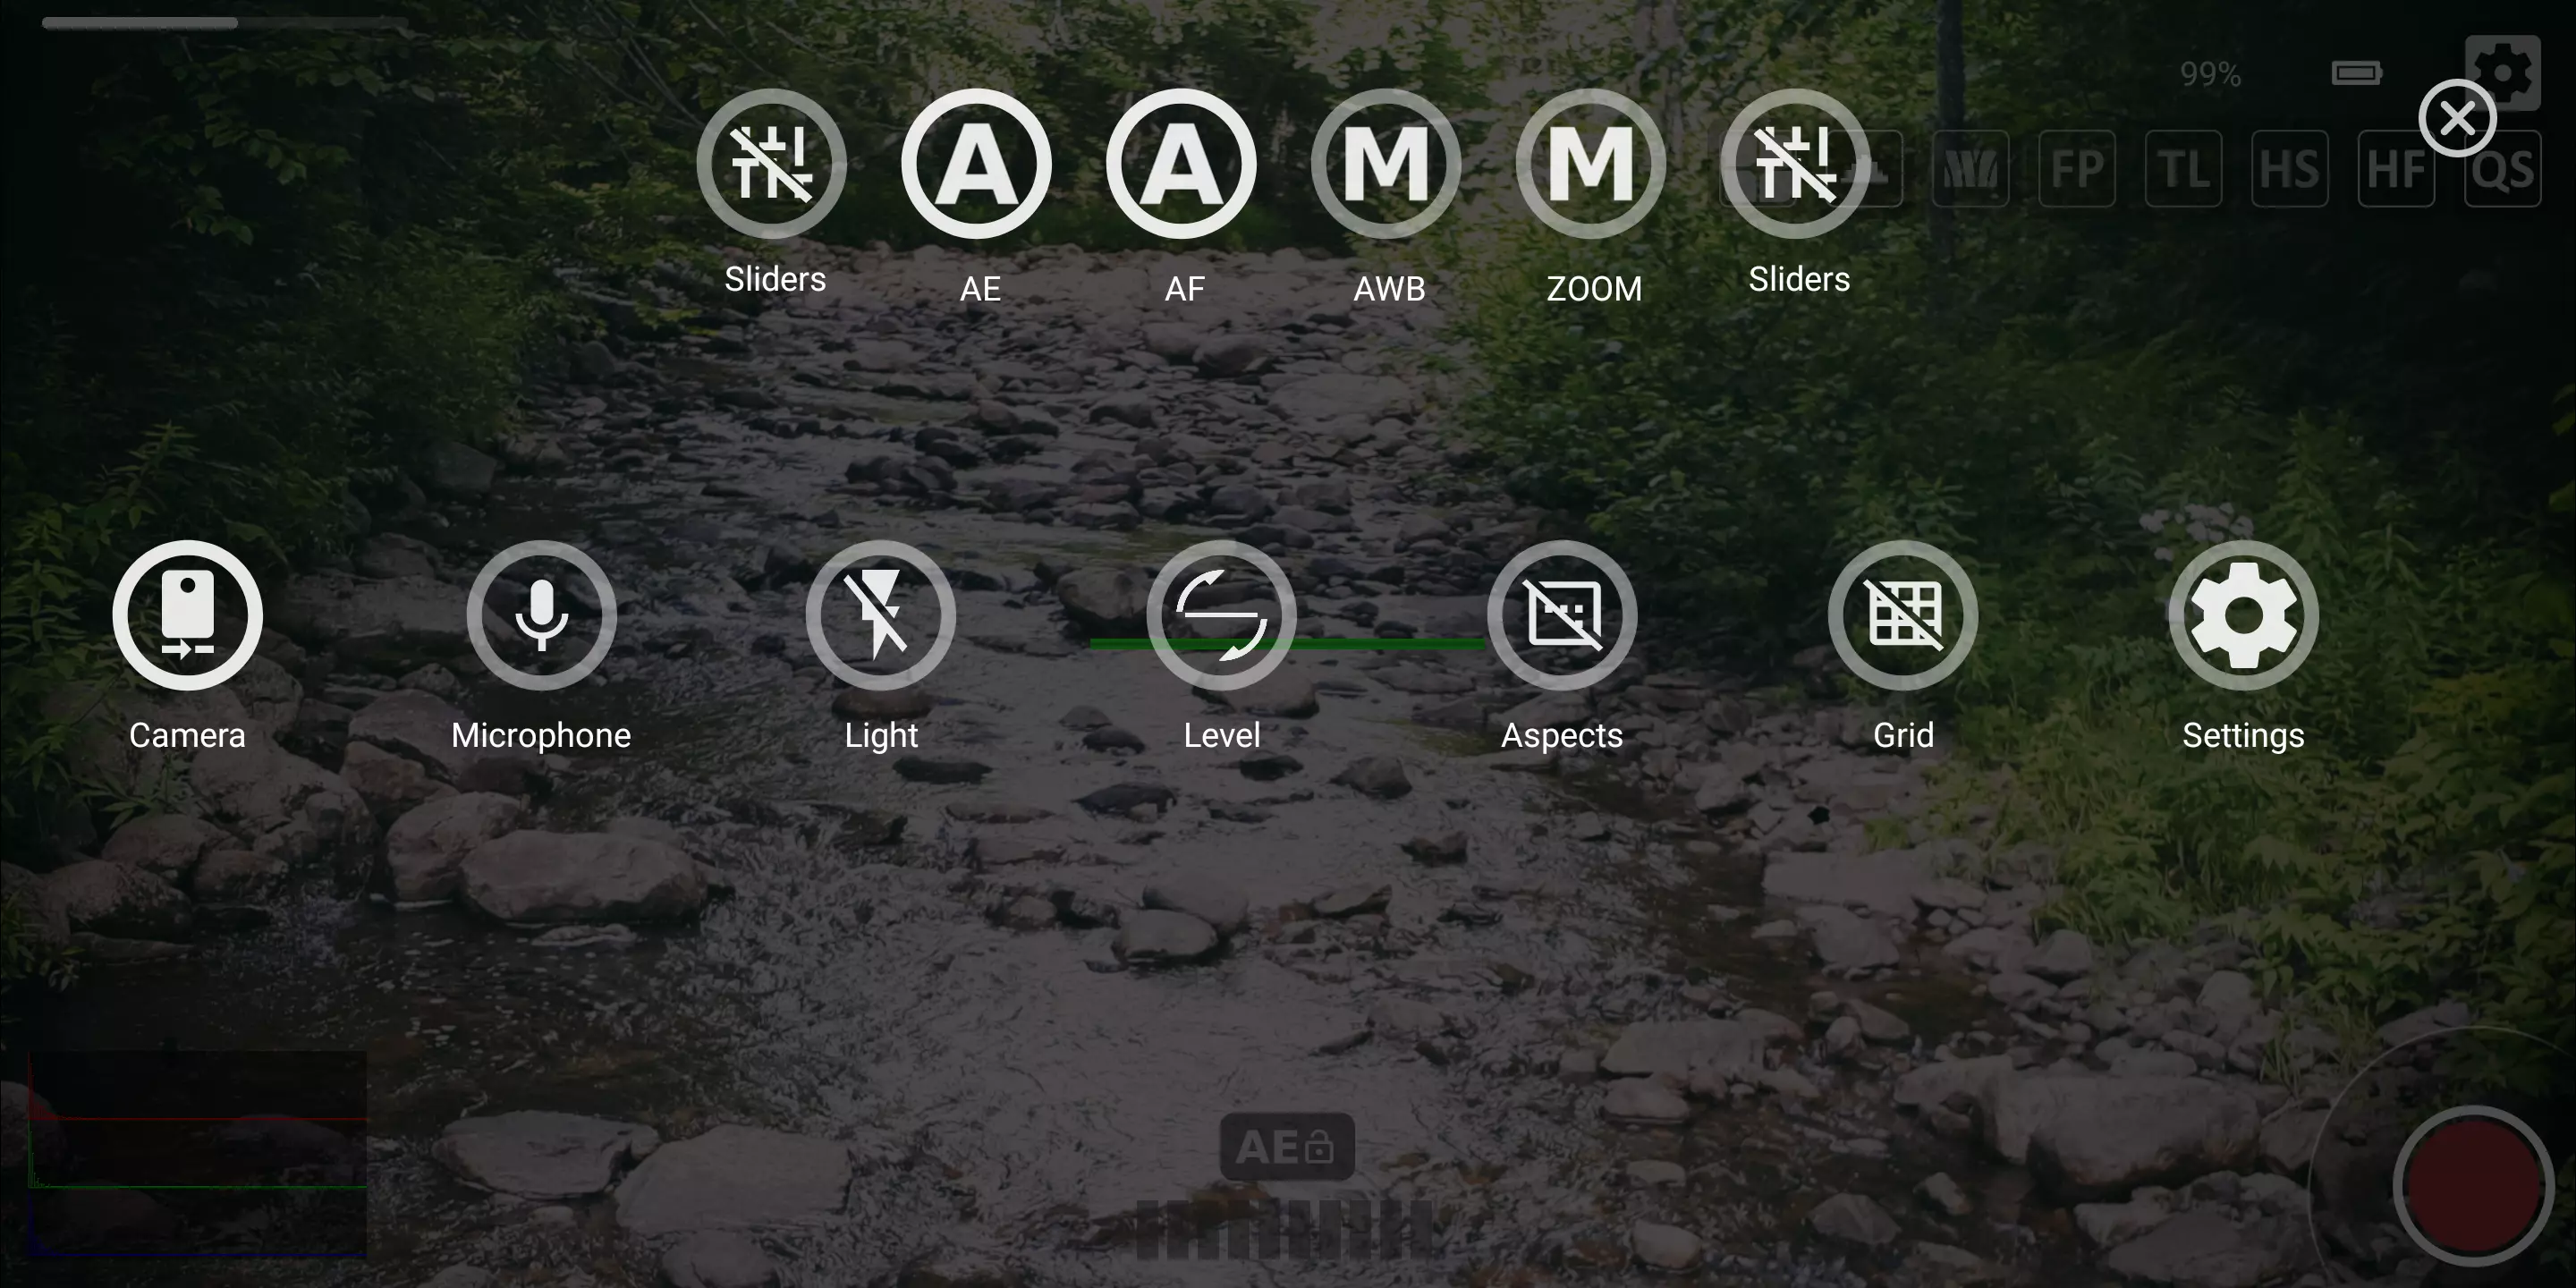
The upper row of buttons lets you manual control focus, exposure, white balance, and zoom. Each button will show either an M for manual control, or A for automatic. Note that setting AE manual will enable control of ISO and exposure controls.
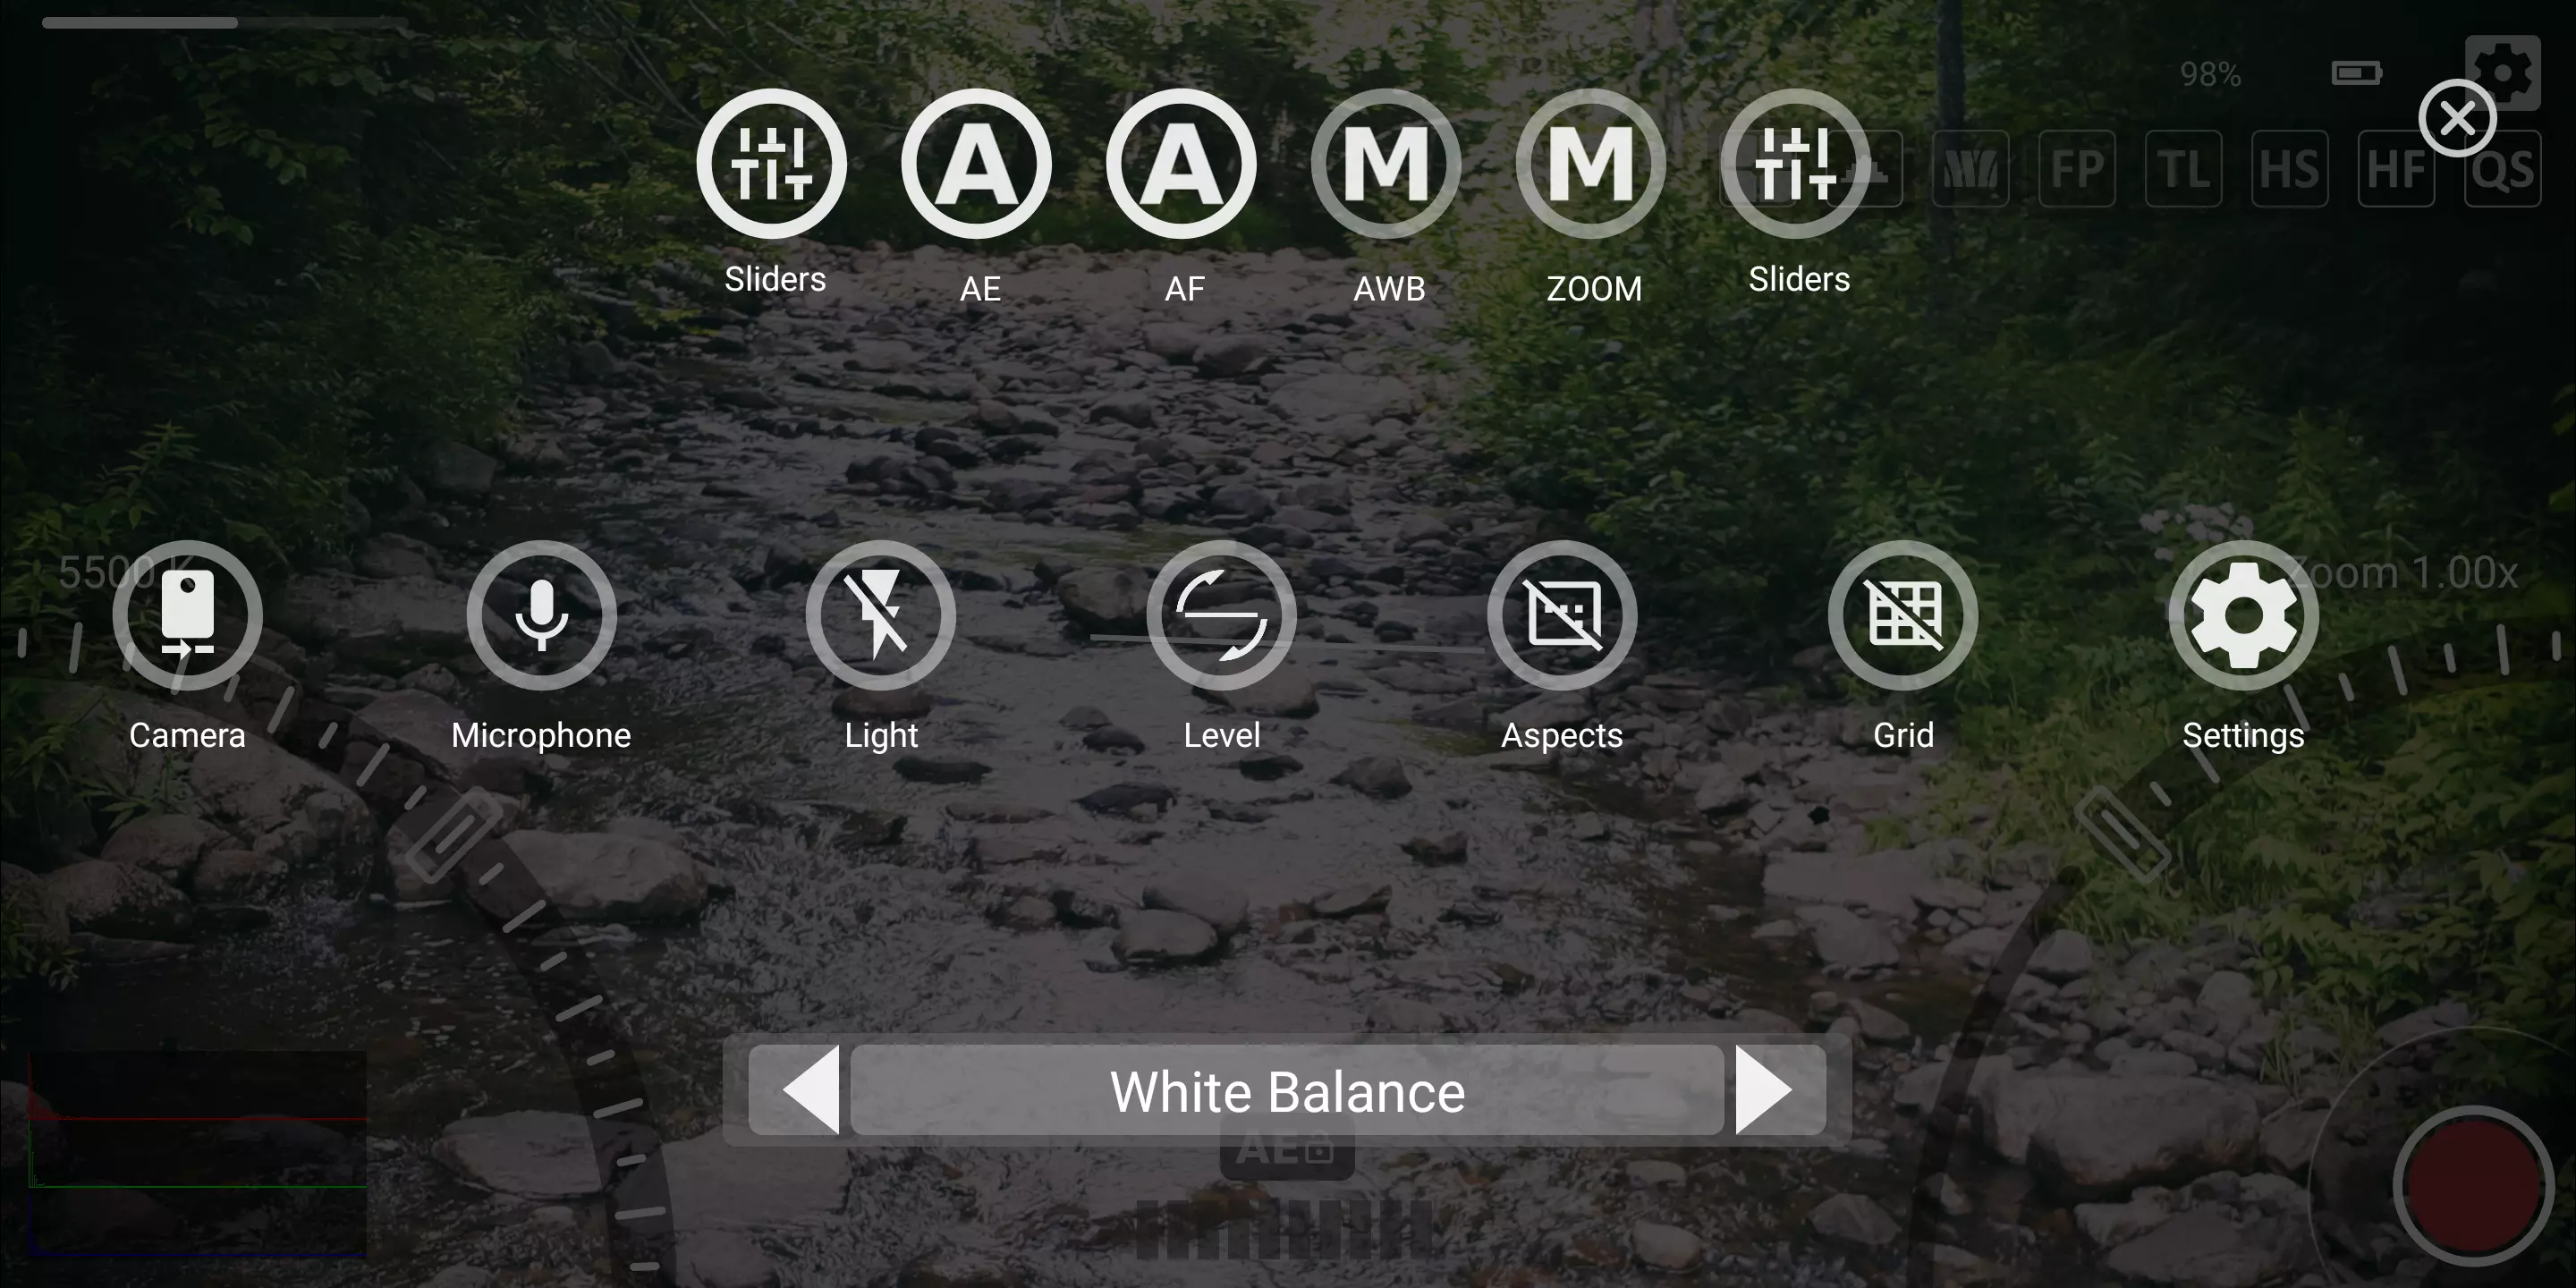
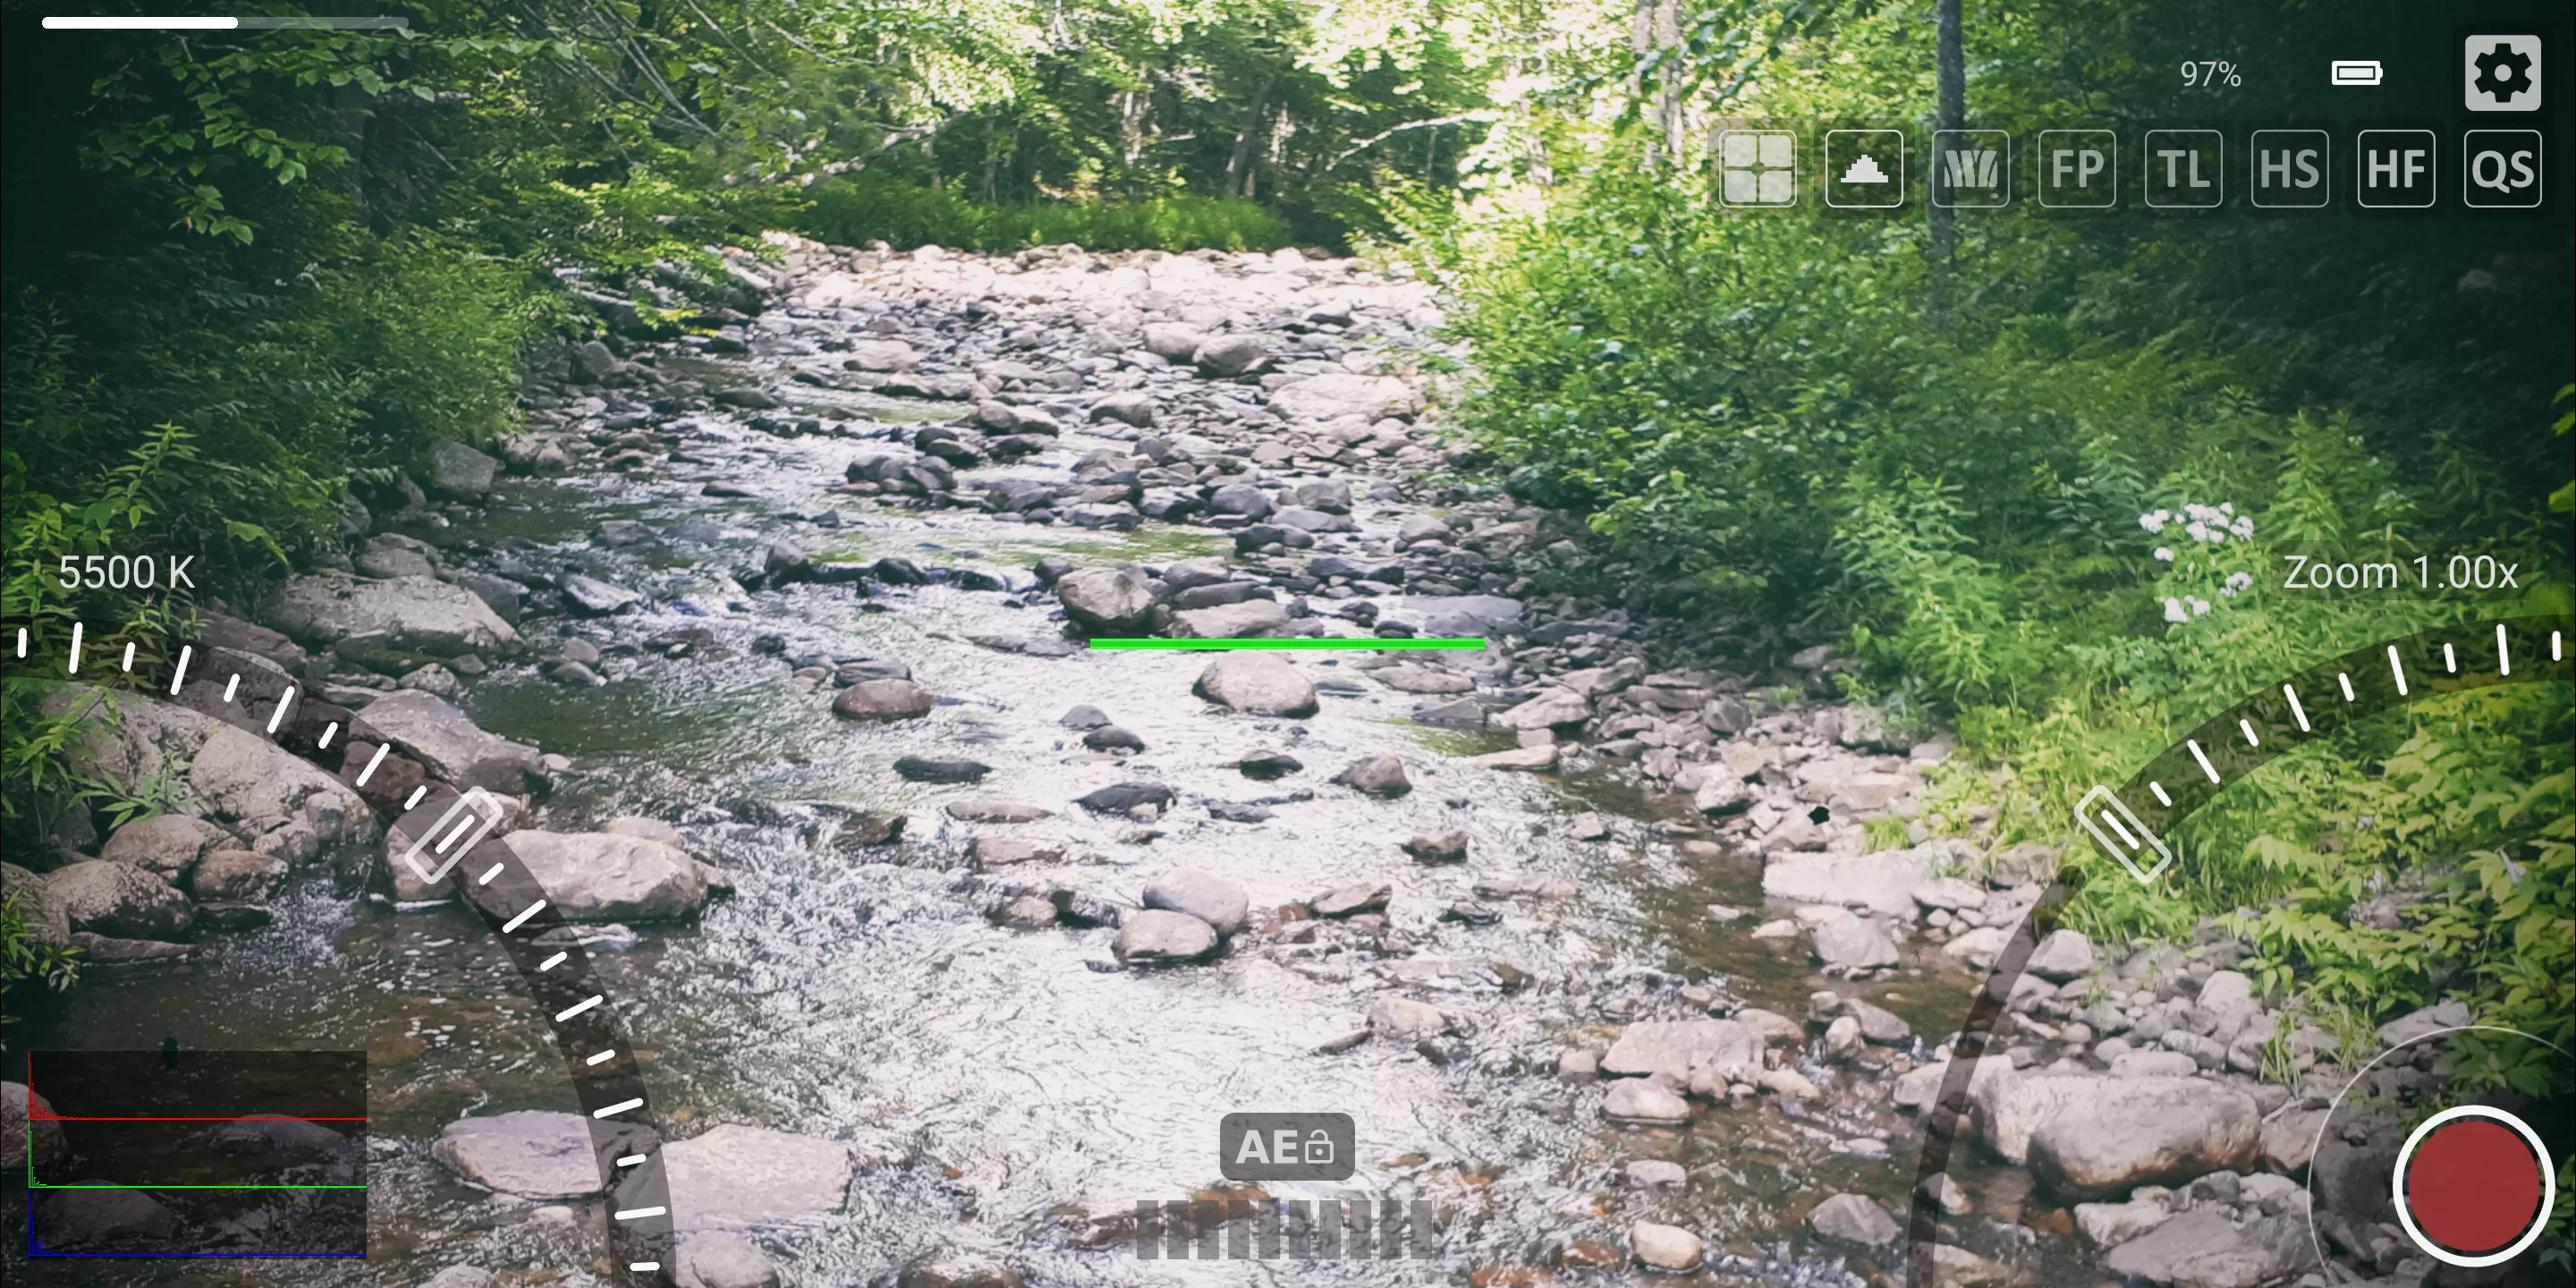
When one of the buttons is set to manual the slider buttons will appear to the left and right of the top row (see image top left). This lets you select what feature to control from the left and right slider control off the main display (see image top right). By selecting a slider value for the left and right you can have one shown left or right on the main or both as shown in the image top right.

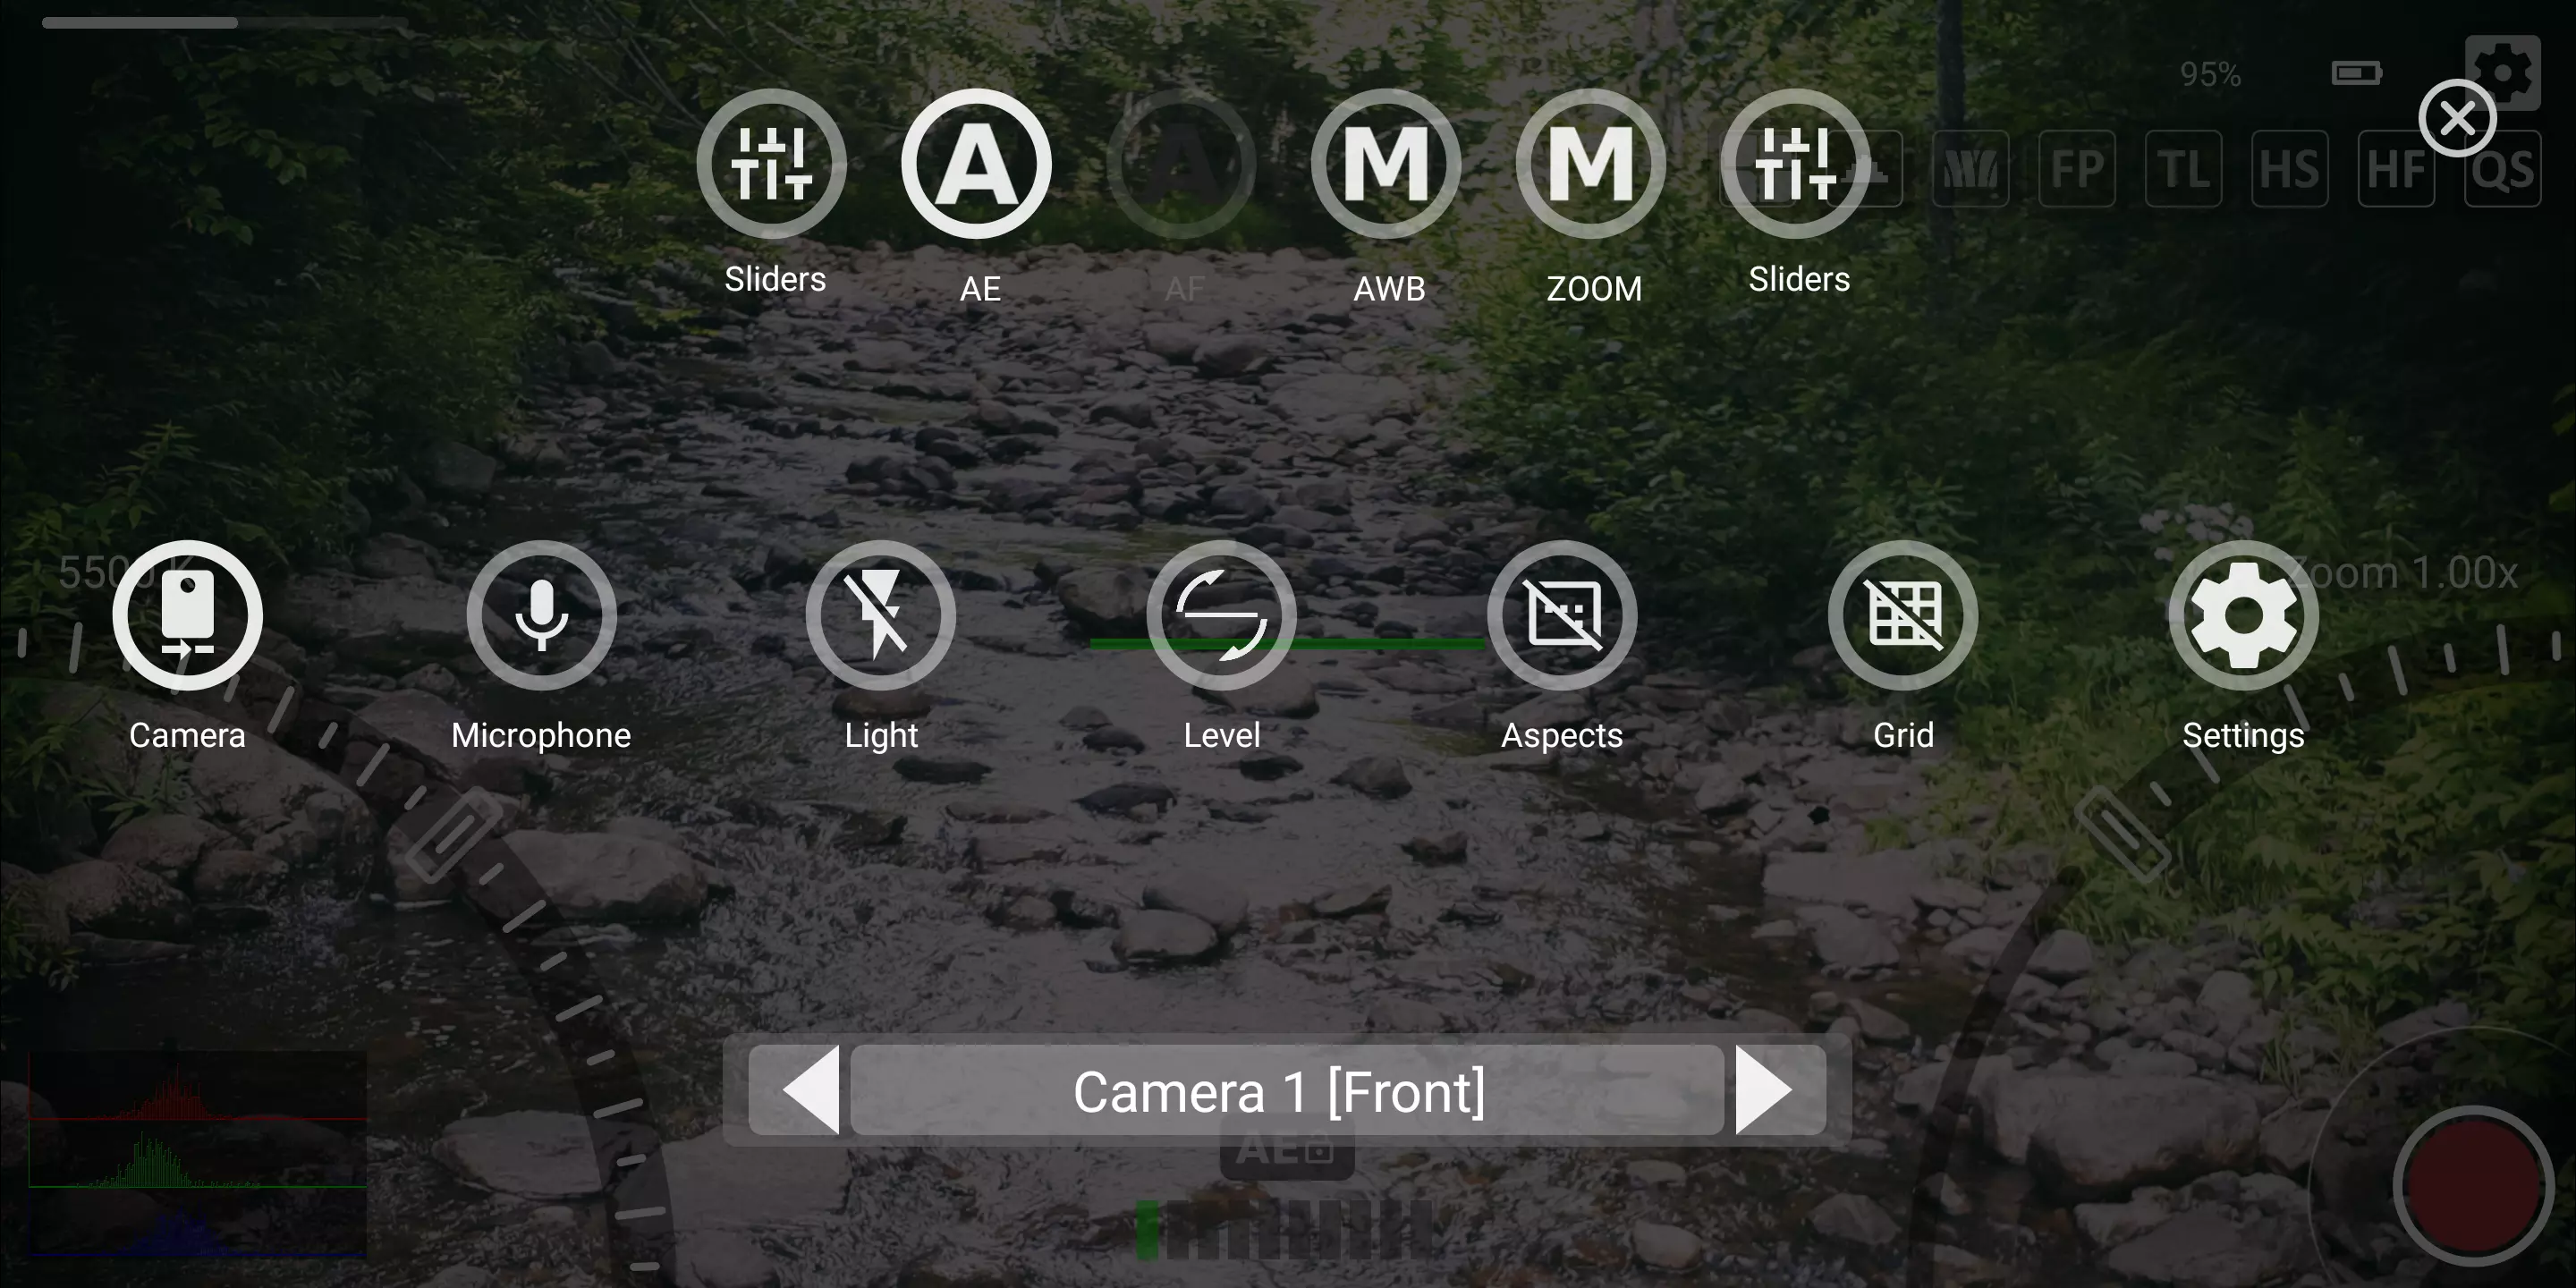
By selecting the camera button you can control which camera to preview and record from. Once selected the ring will be white and selection can be done by clicking the right or left arrow at the bottom of the display. On most devices this will mean that either the rear camera, or front camera, or both with be available. Note that only one camera can be selected at a time, and that changing cameras can view will cause recording to stop.
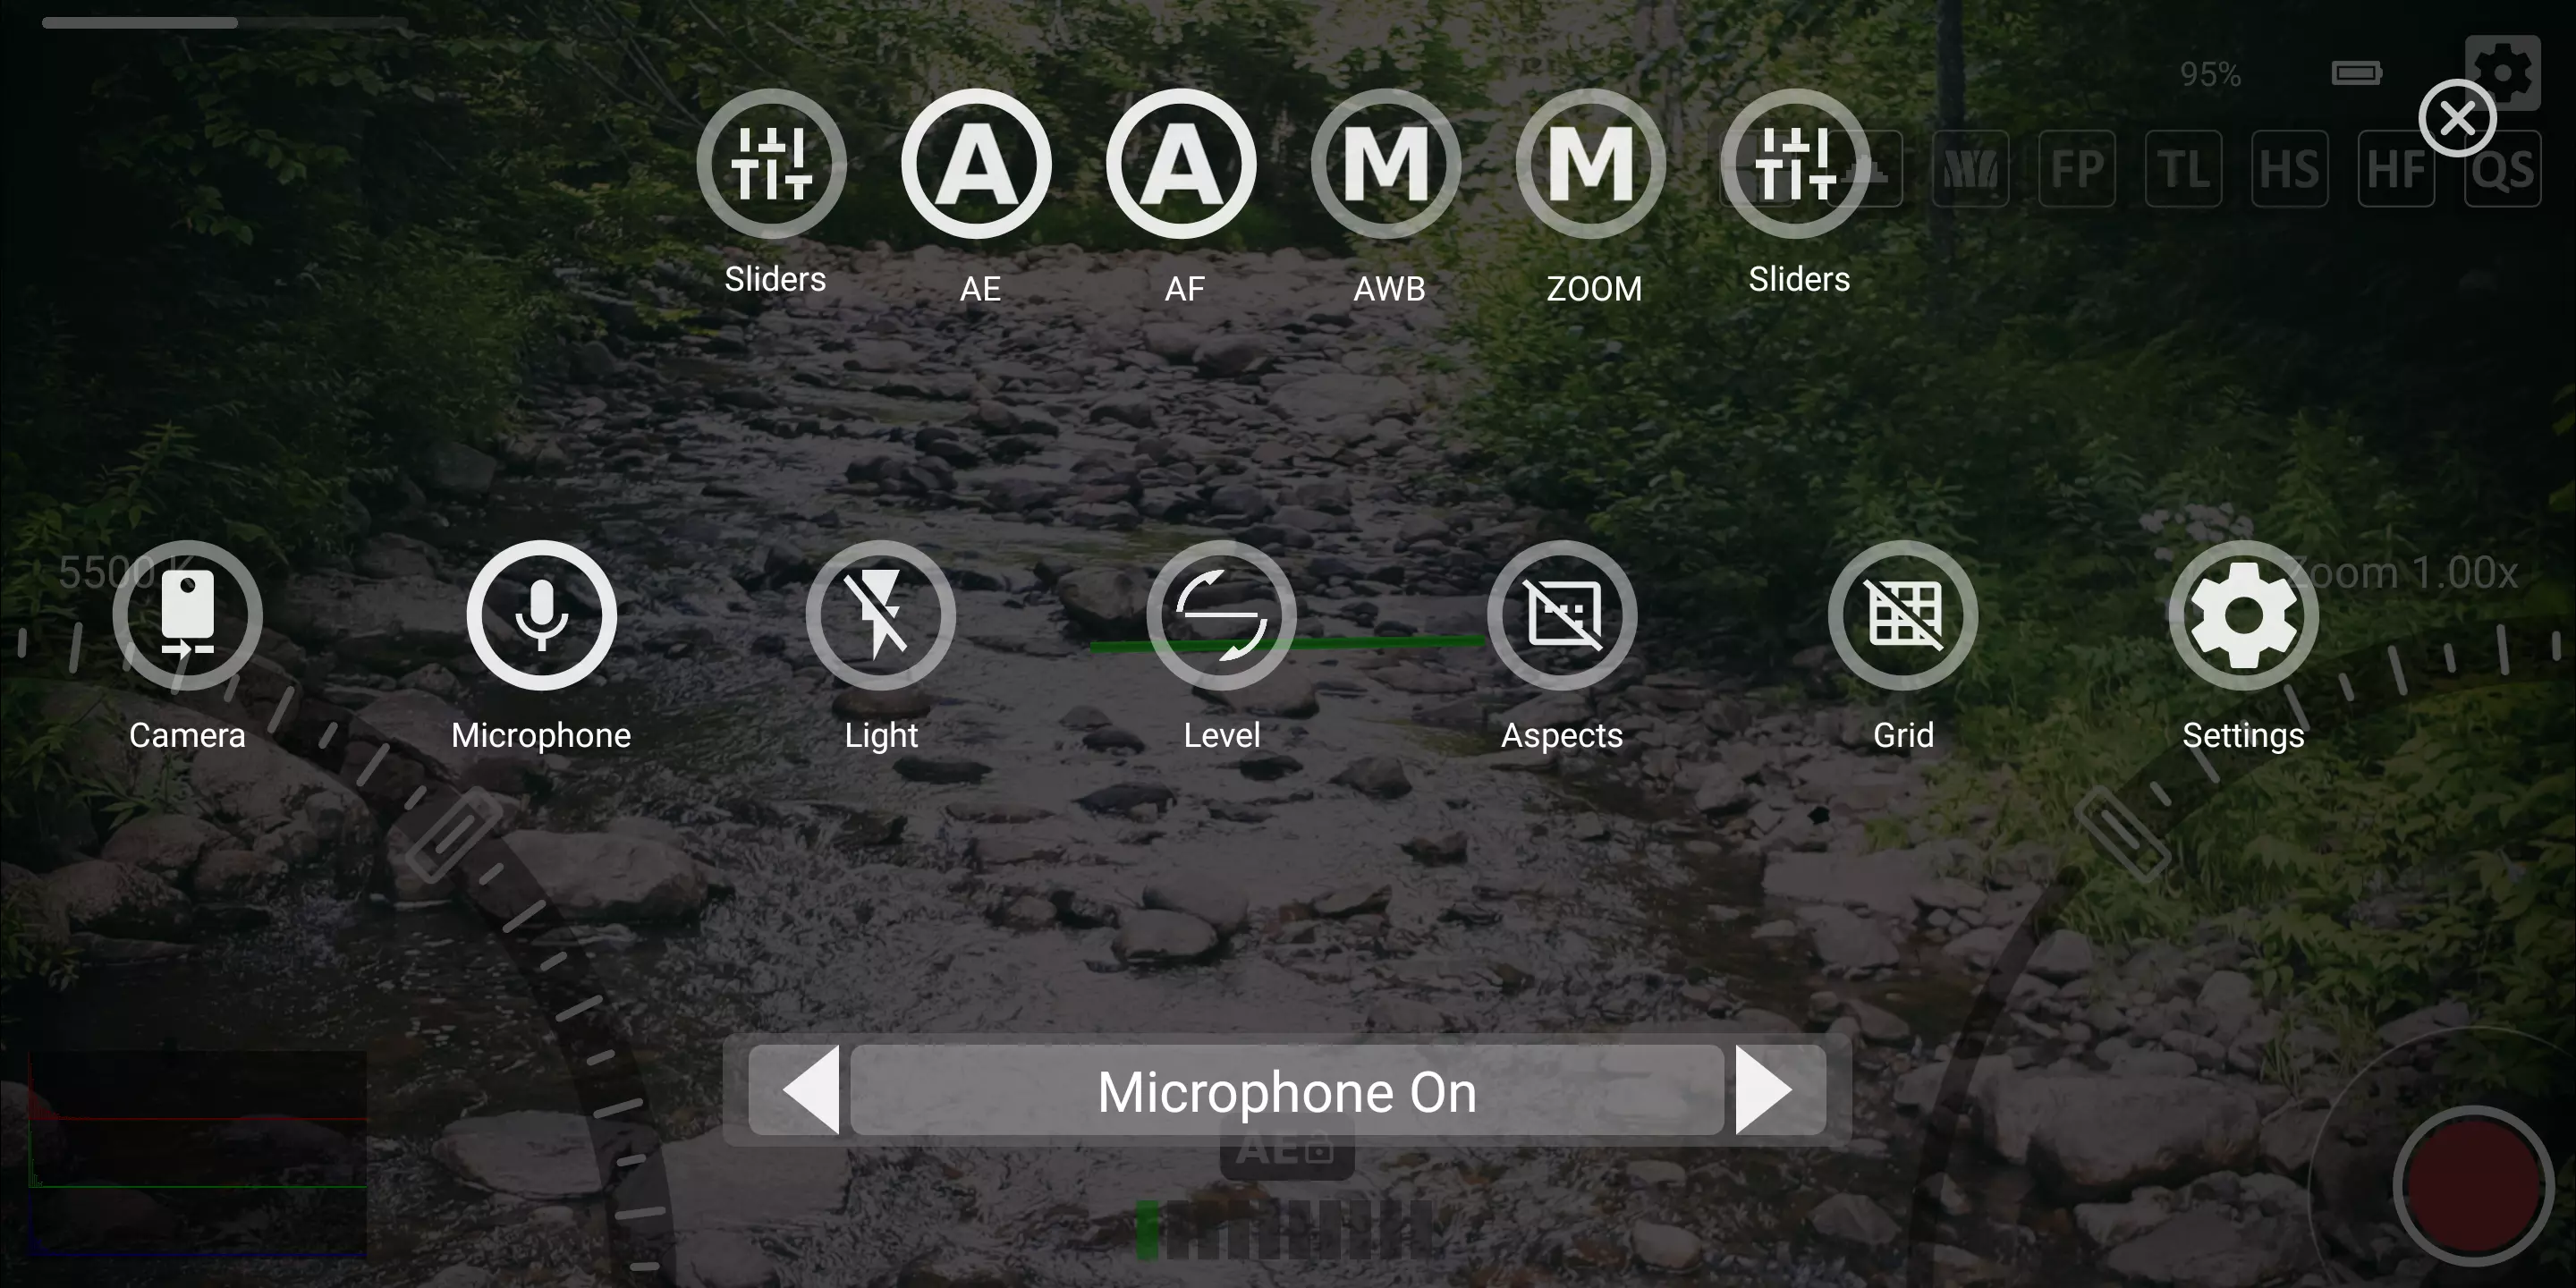

By selecting the microphone button you can control whether to record audio or not while filming. Once selected the ring will be white and selection can be done by clicking the right or left arrow at the bottom of the display. Note that toggling the microphone on or off while recording will cause recording to stop.


By selecting the light button you can control whether to use the devices flash as video light. Once selected the ring will be white and selection can be done by clicking the right or left arrow at the bottom of the display.
Note that on some devices leaving the light for extended times can cause the device to heat up and will also drain the devices battery faster. Older devices may not support this feature. Do not use if not recommended by
manufacturer.
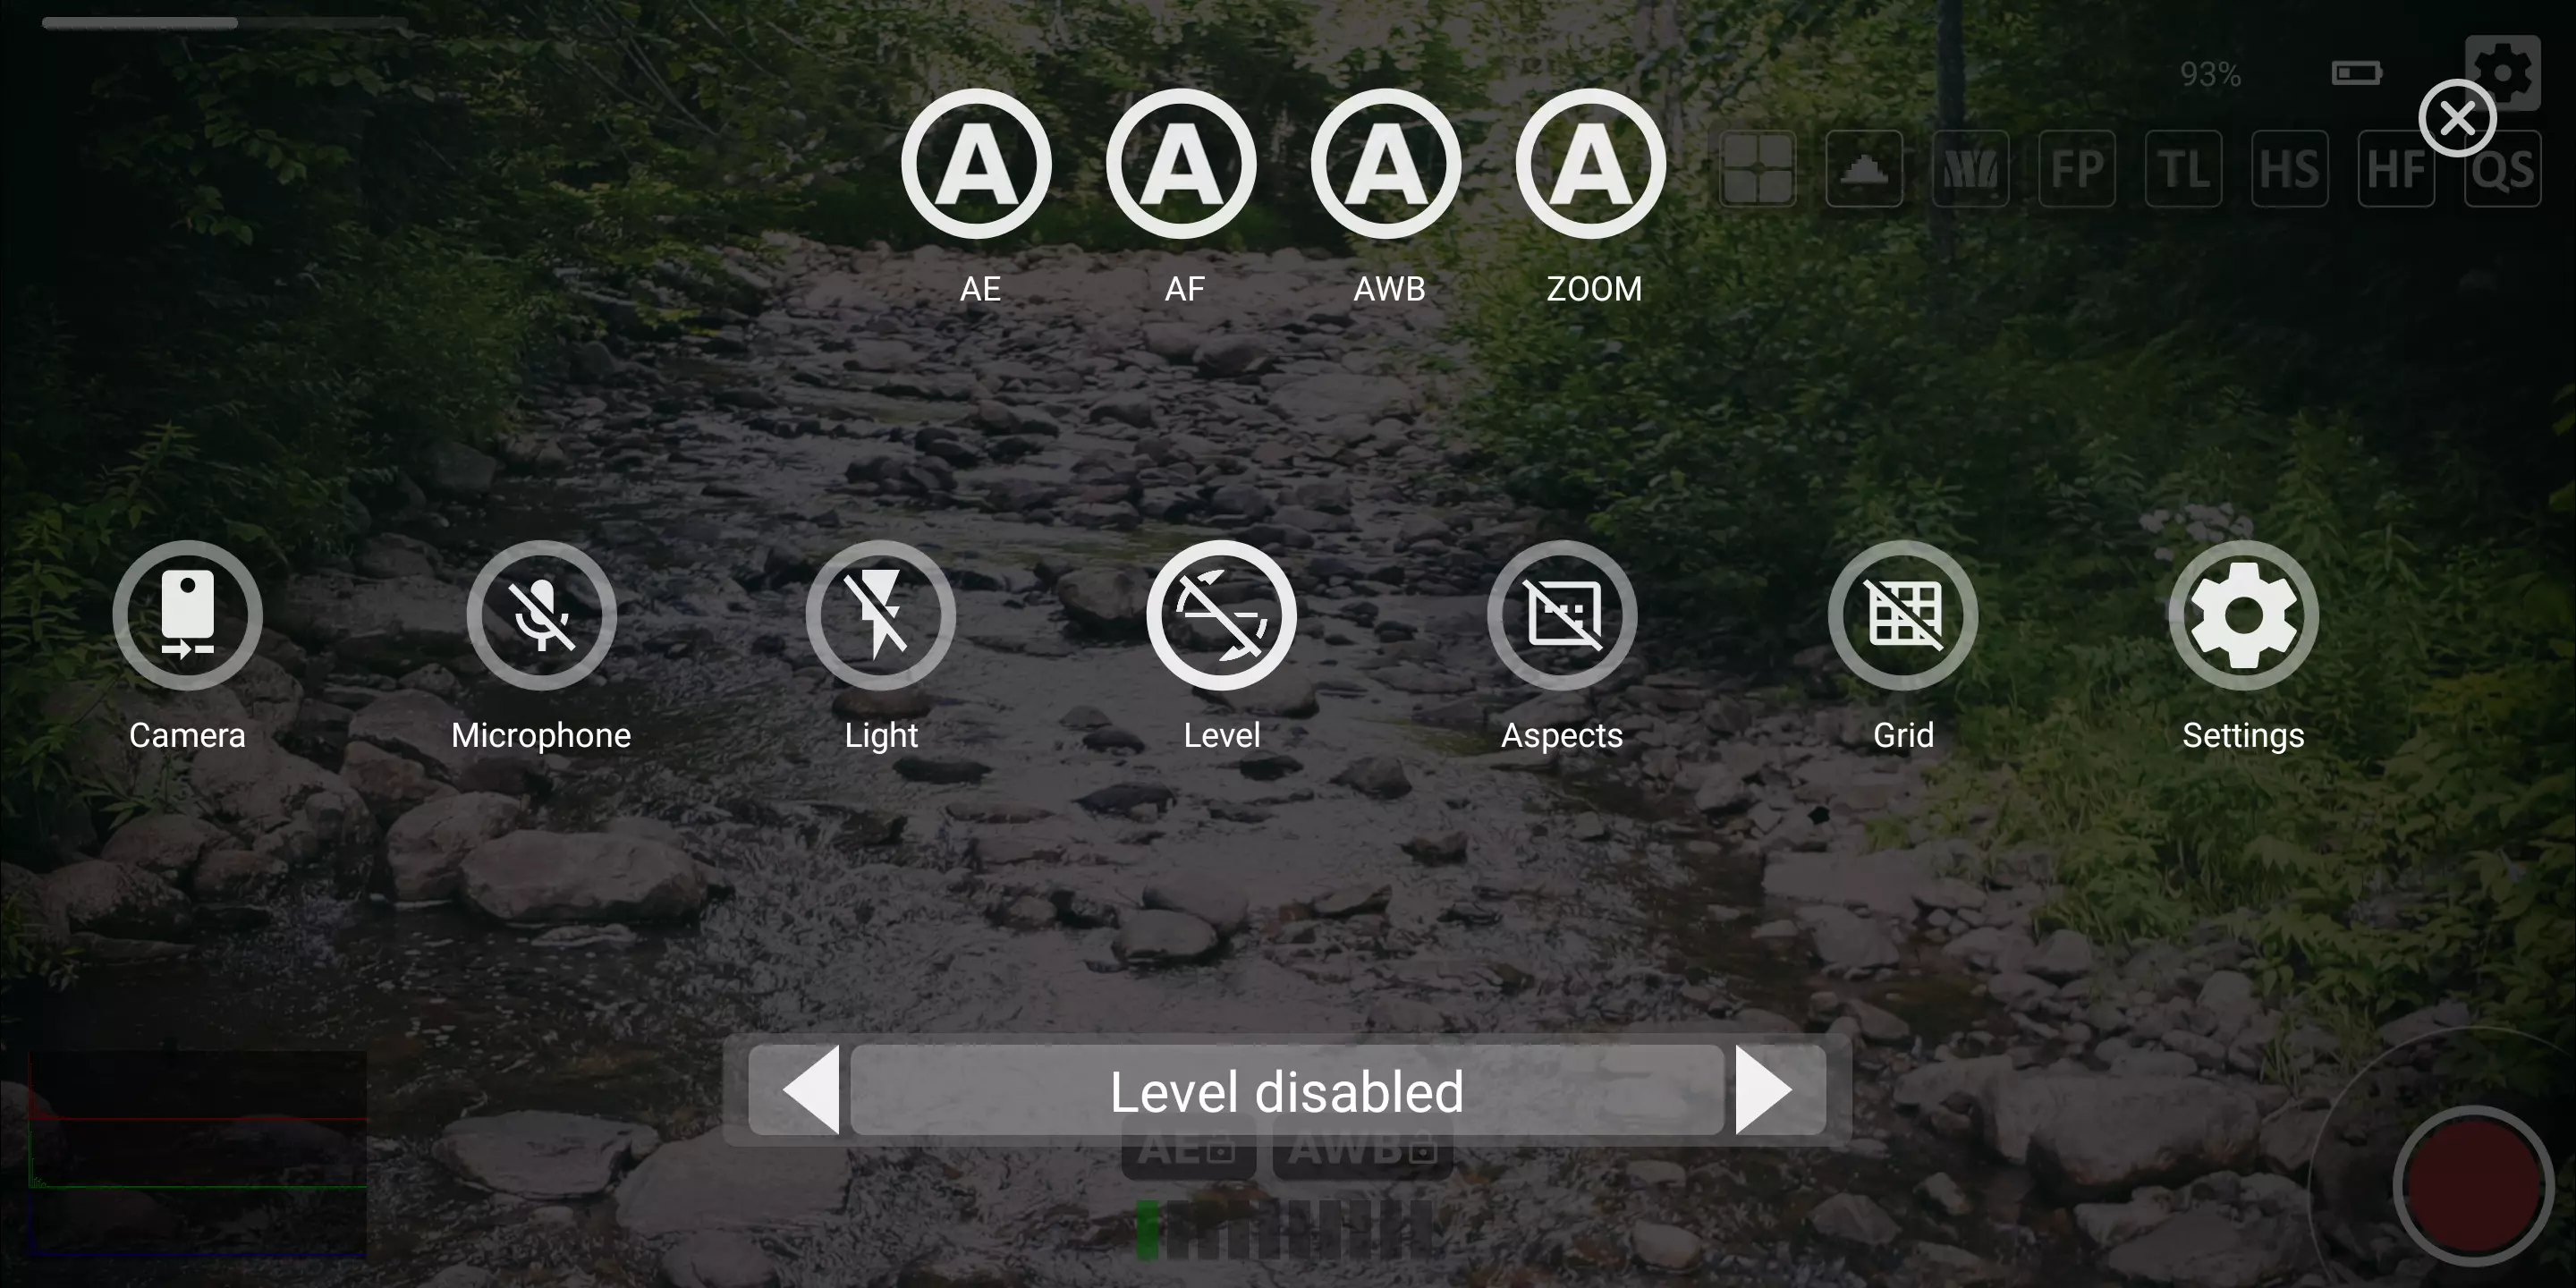
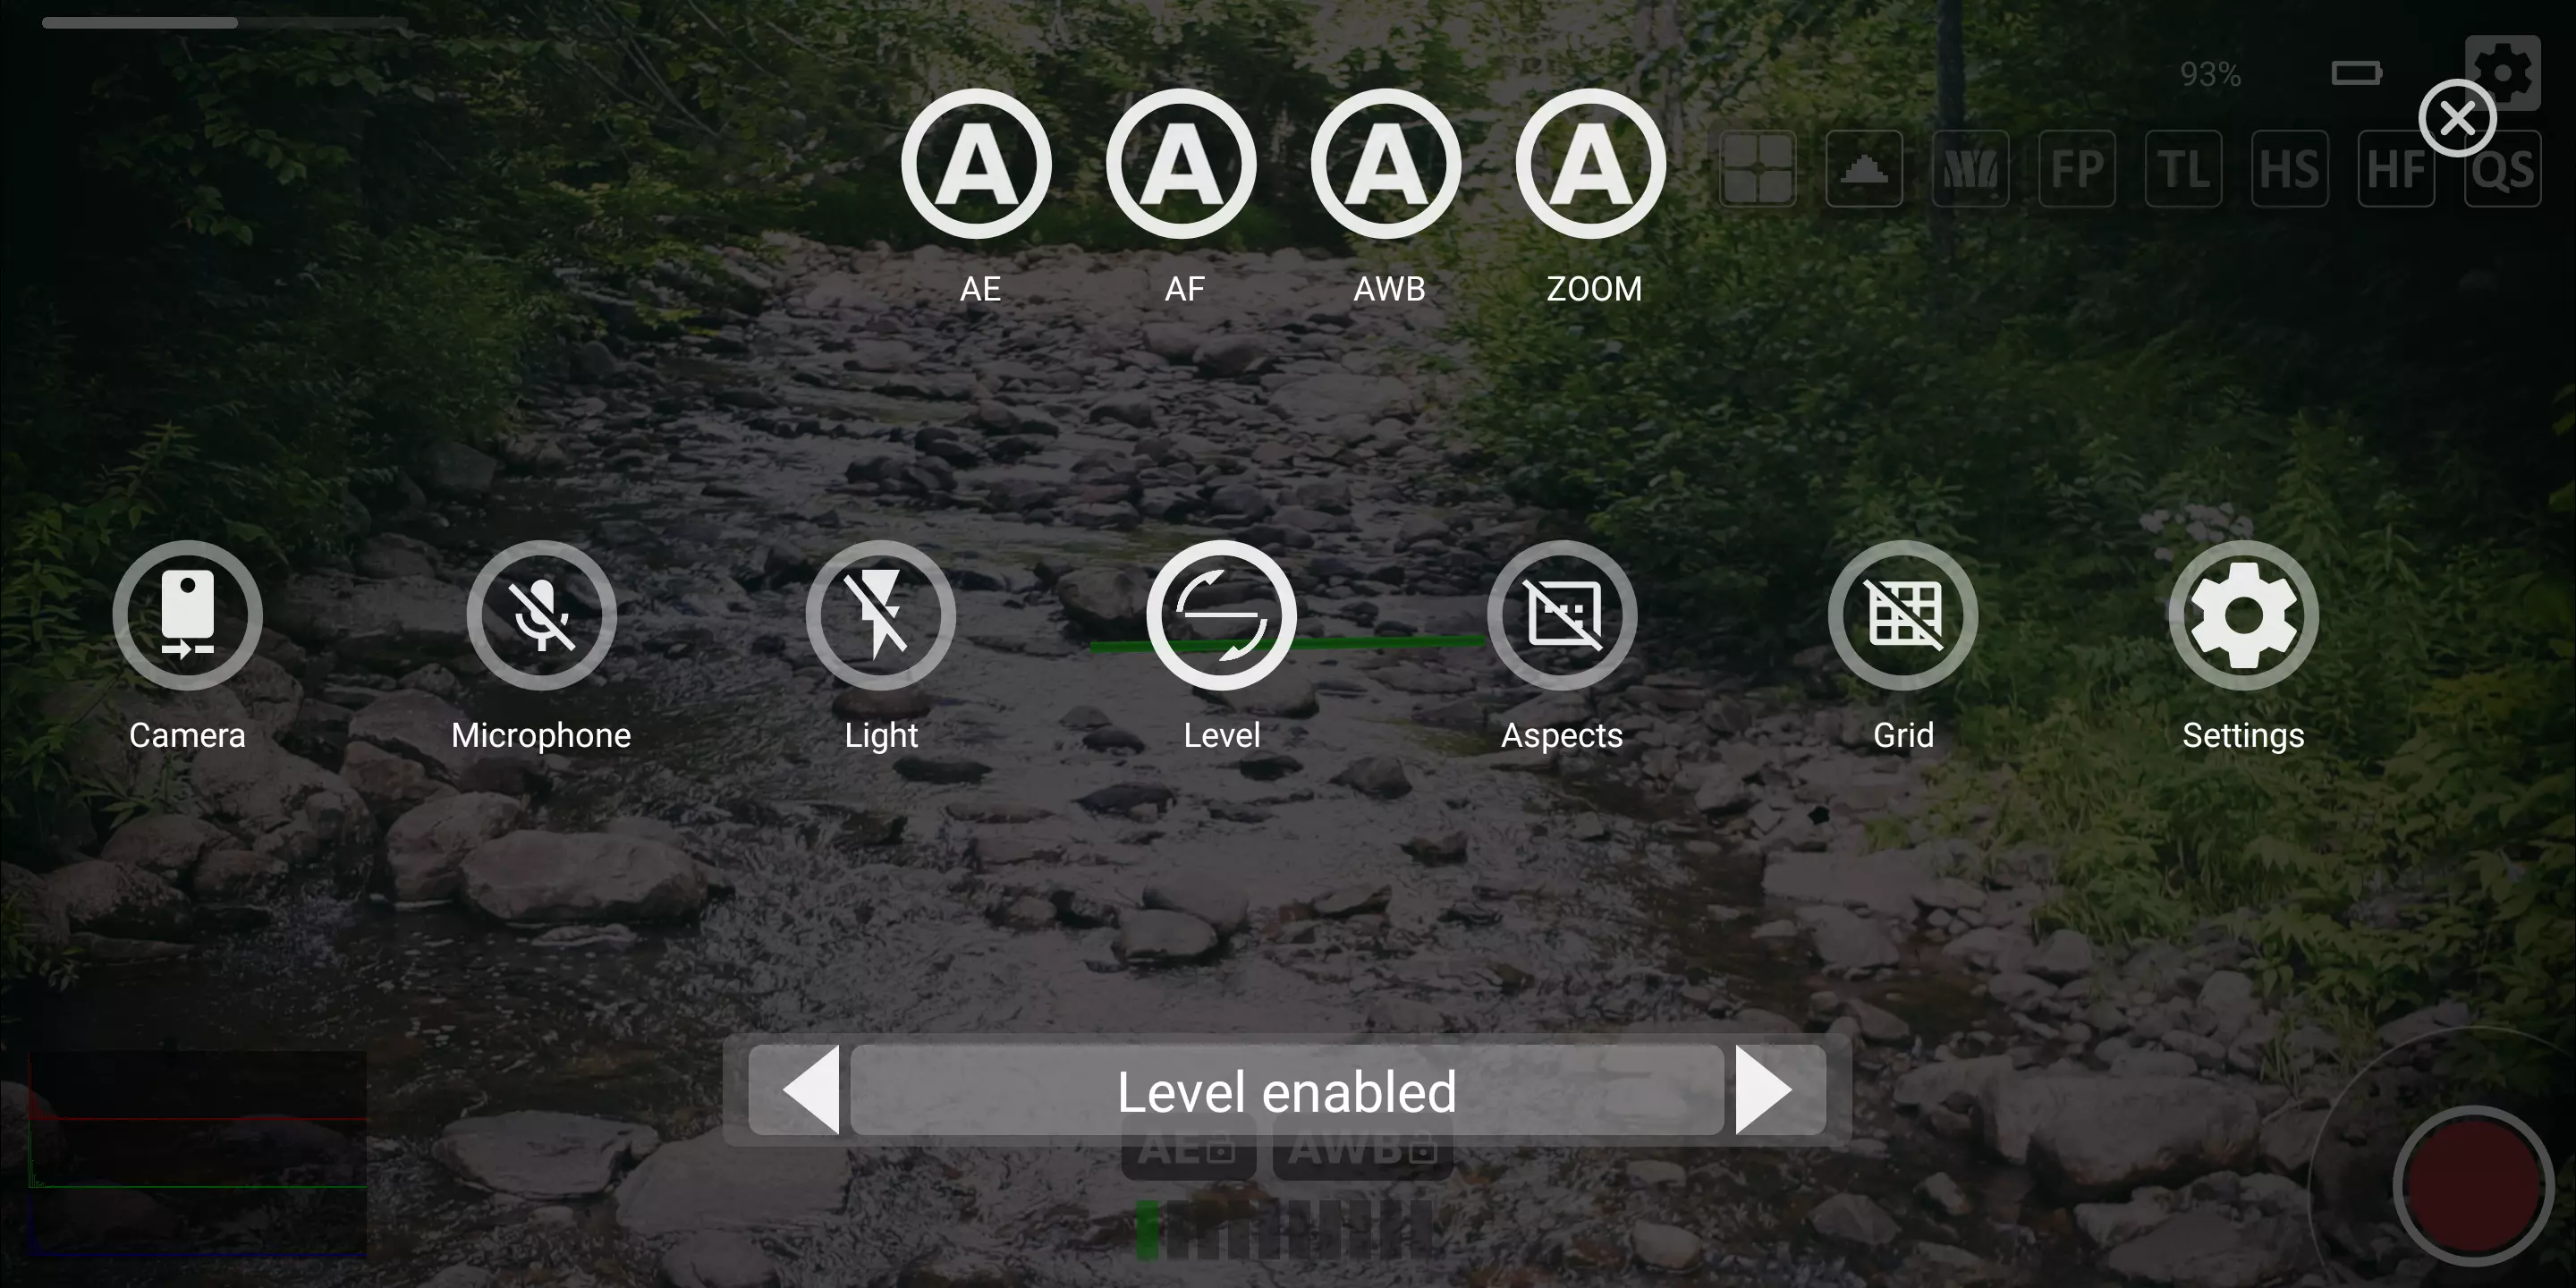
By selecting the level button you can control whether to display the level indicator on the main display. Once selected the ring will be white and selection can be done by clicking the right or left arrow at the bottom of the display. When displaying the indicator a green line will indicate that the device will be level within a 2° angle (note that accuracy varies due to depending on manufacturer sensor and support offered). A white line will indicate that the device is not level. Before using the level indicator make sure to calibrate the device by doing a figure 8 movement with the device.

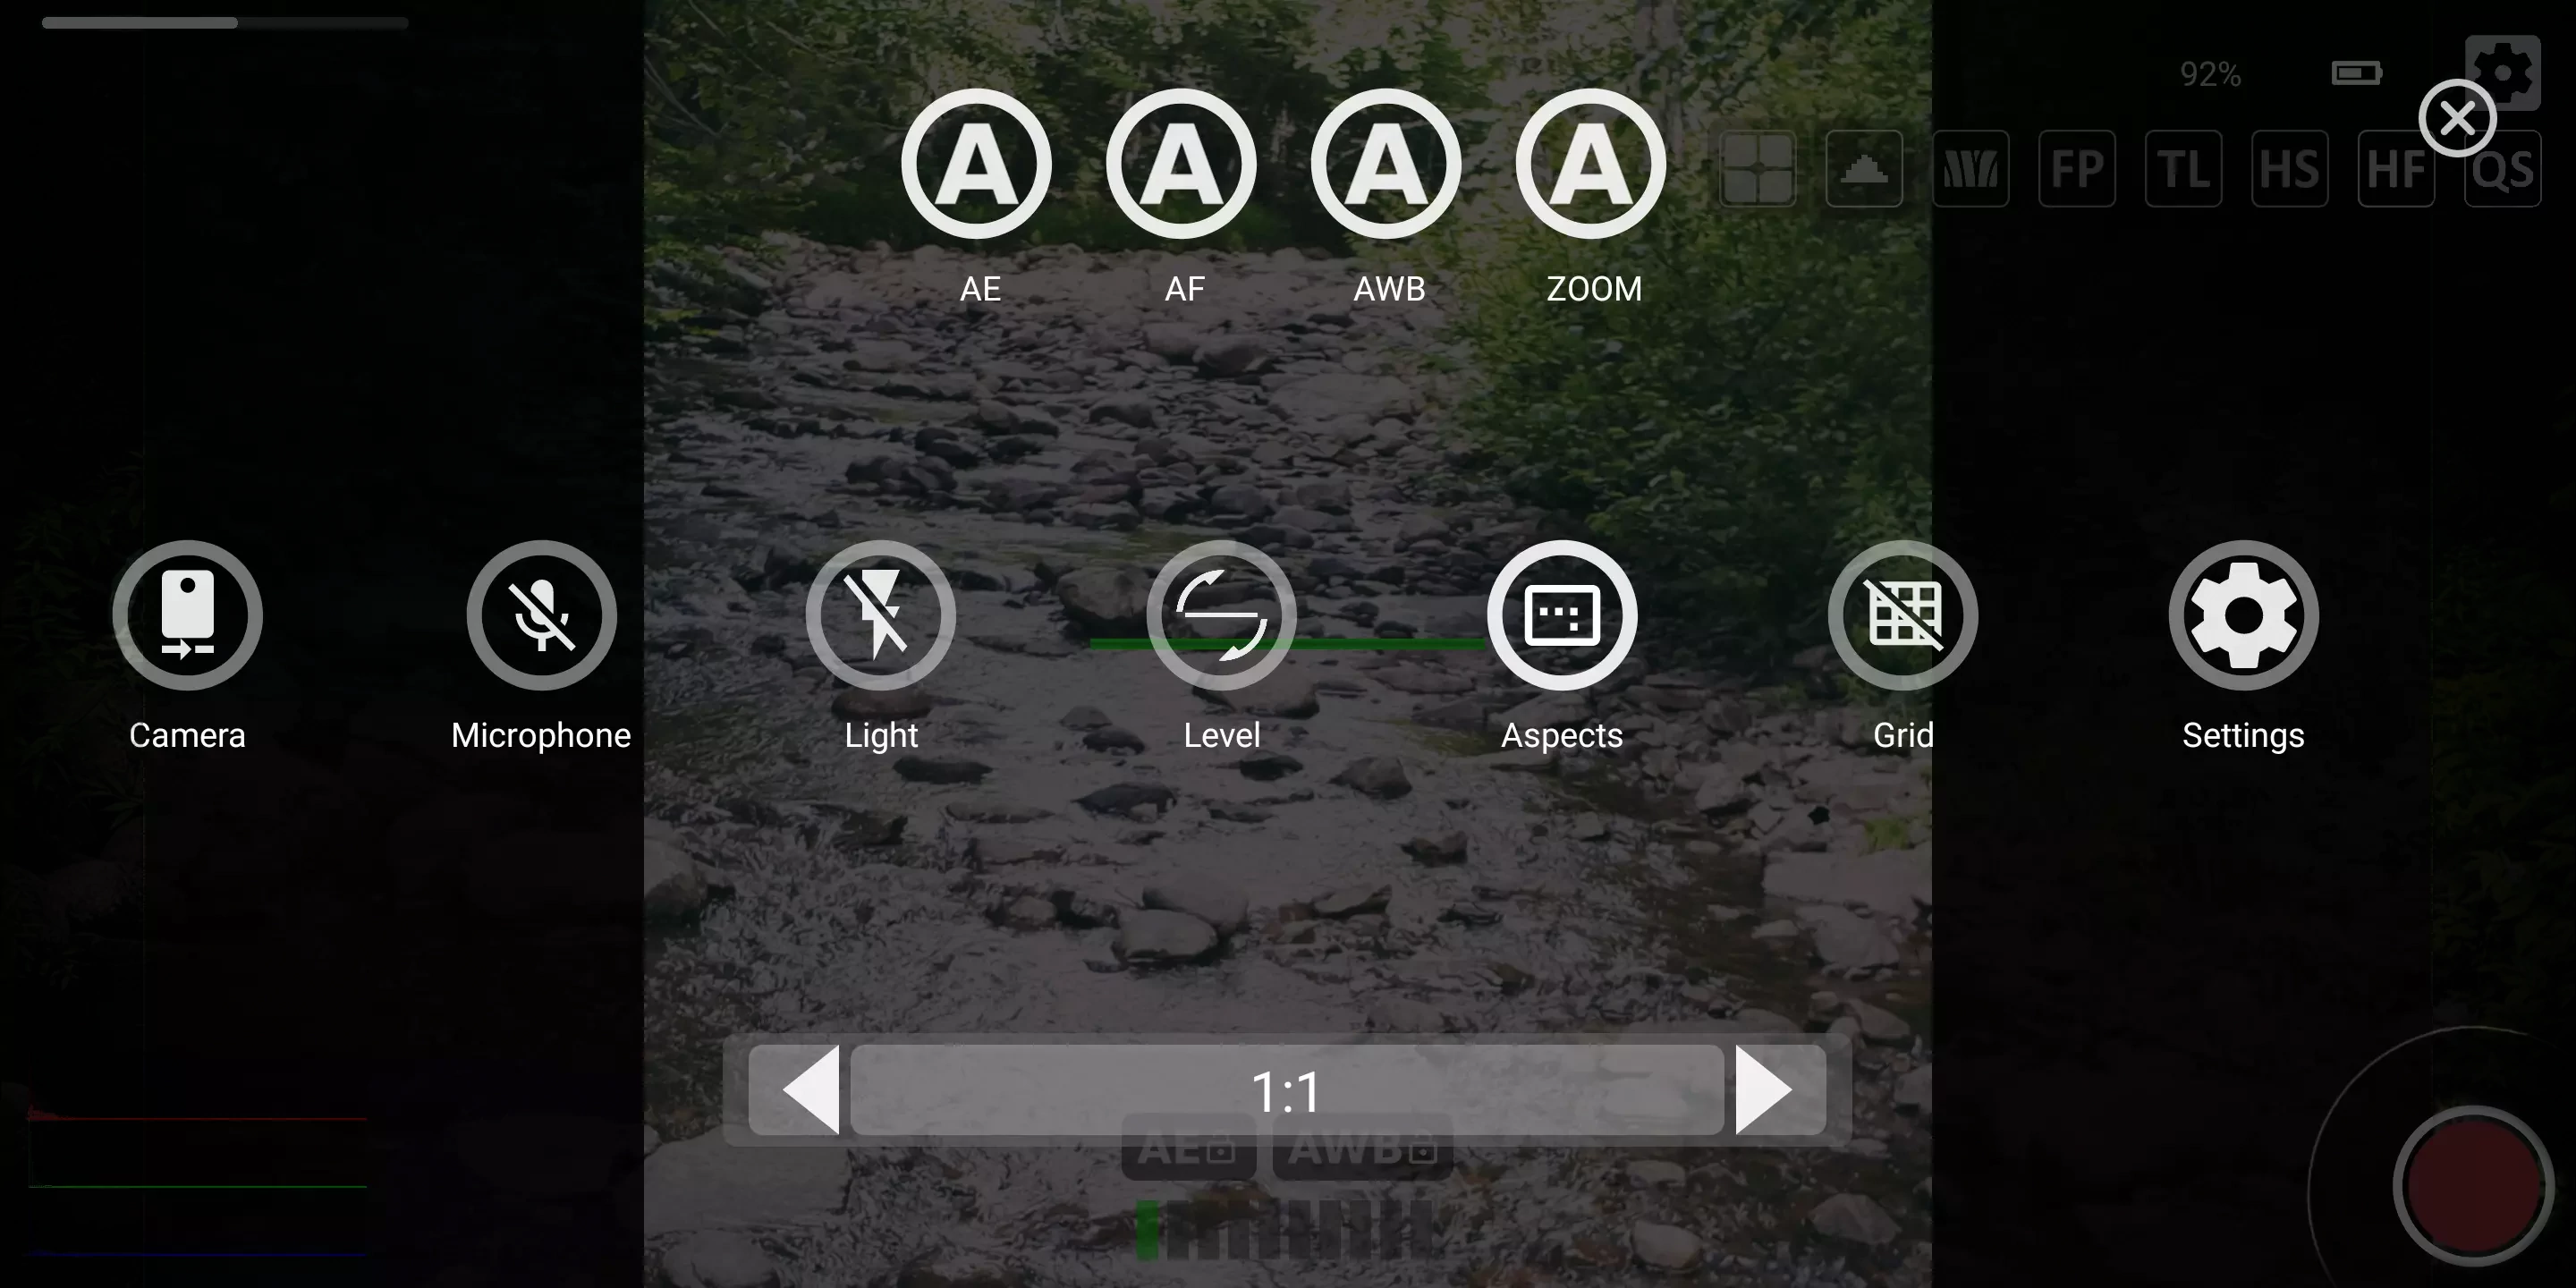
By selecting the aspects button you can control whether to display the aspects crop overlay on the main display. Once selected the ring will be white and selection can be done by clicking the right or left arrow at the bottom of the display. Available aspect crop marks are 1:1, 2:1, 2.2:1, 2.39:1, 2.59:1, 2.76:1, 4:3, 5:4, 16:9, 16:10. When using aspects crop overlay and grid marks the grid marks will be constrained to the non overlayed portion.


By selecting the grid button you can control whether to display the grid mark overlay on the main display. Once selected the ring will be white and selection can be done by clicking the right or left arrow at the bottom of the display. Available grid marks are rule of thirds, cross-hair, combined rule of thirds & cross-hair, golden ratio, golden ratio inverted, golden ratio mirrored, golden ratio mirrored inverted. When using grid marks and aspects crop overlays the grid marks will be constrained to the non overlayed portion.
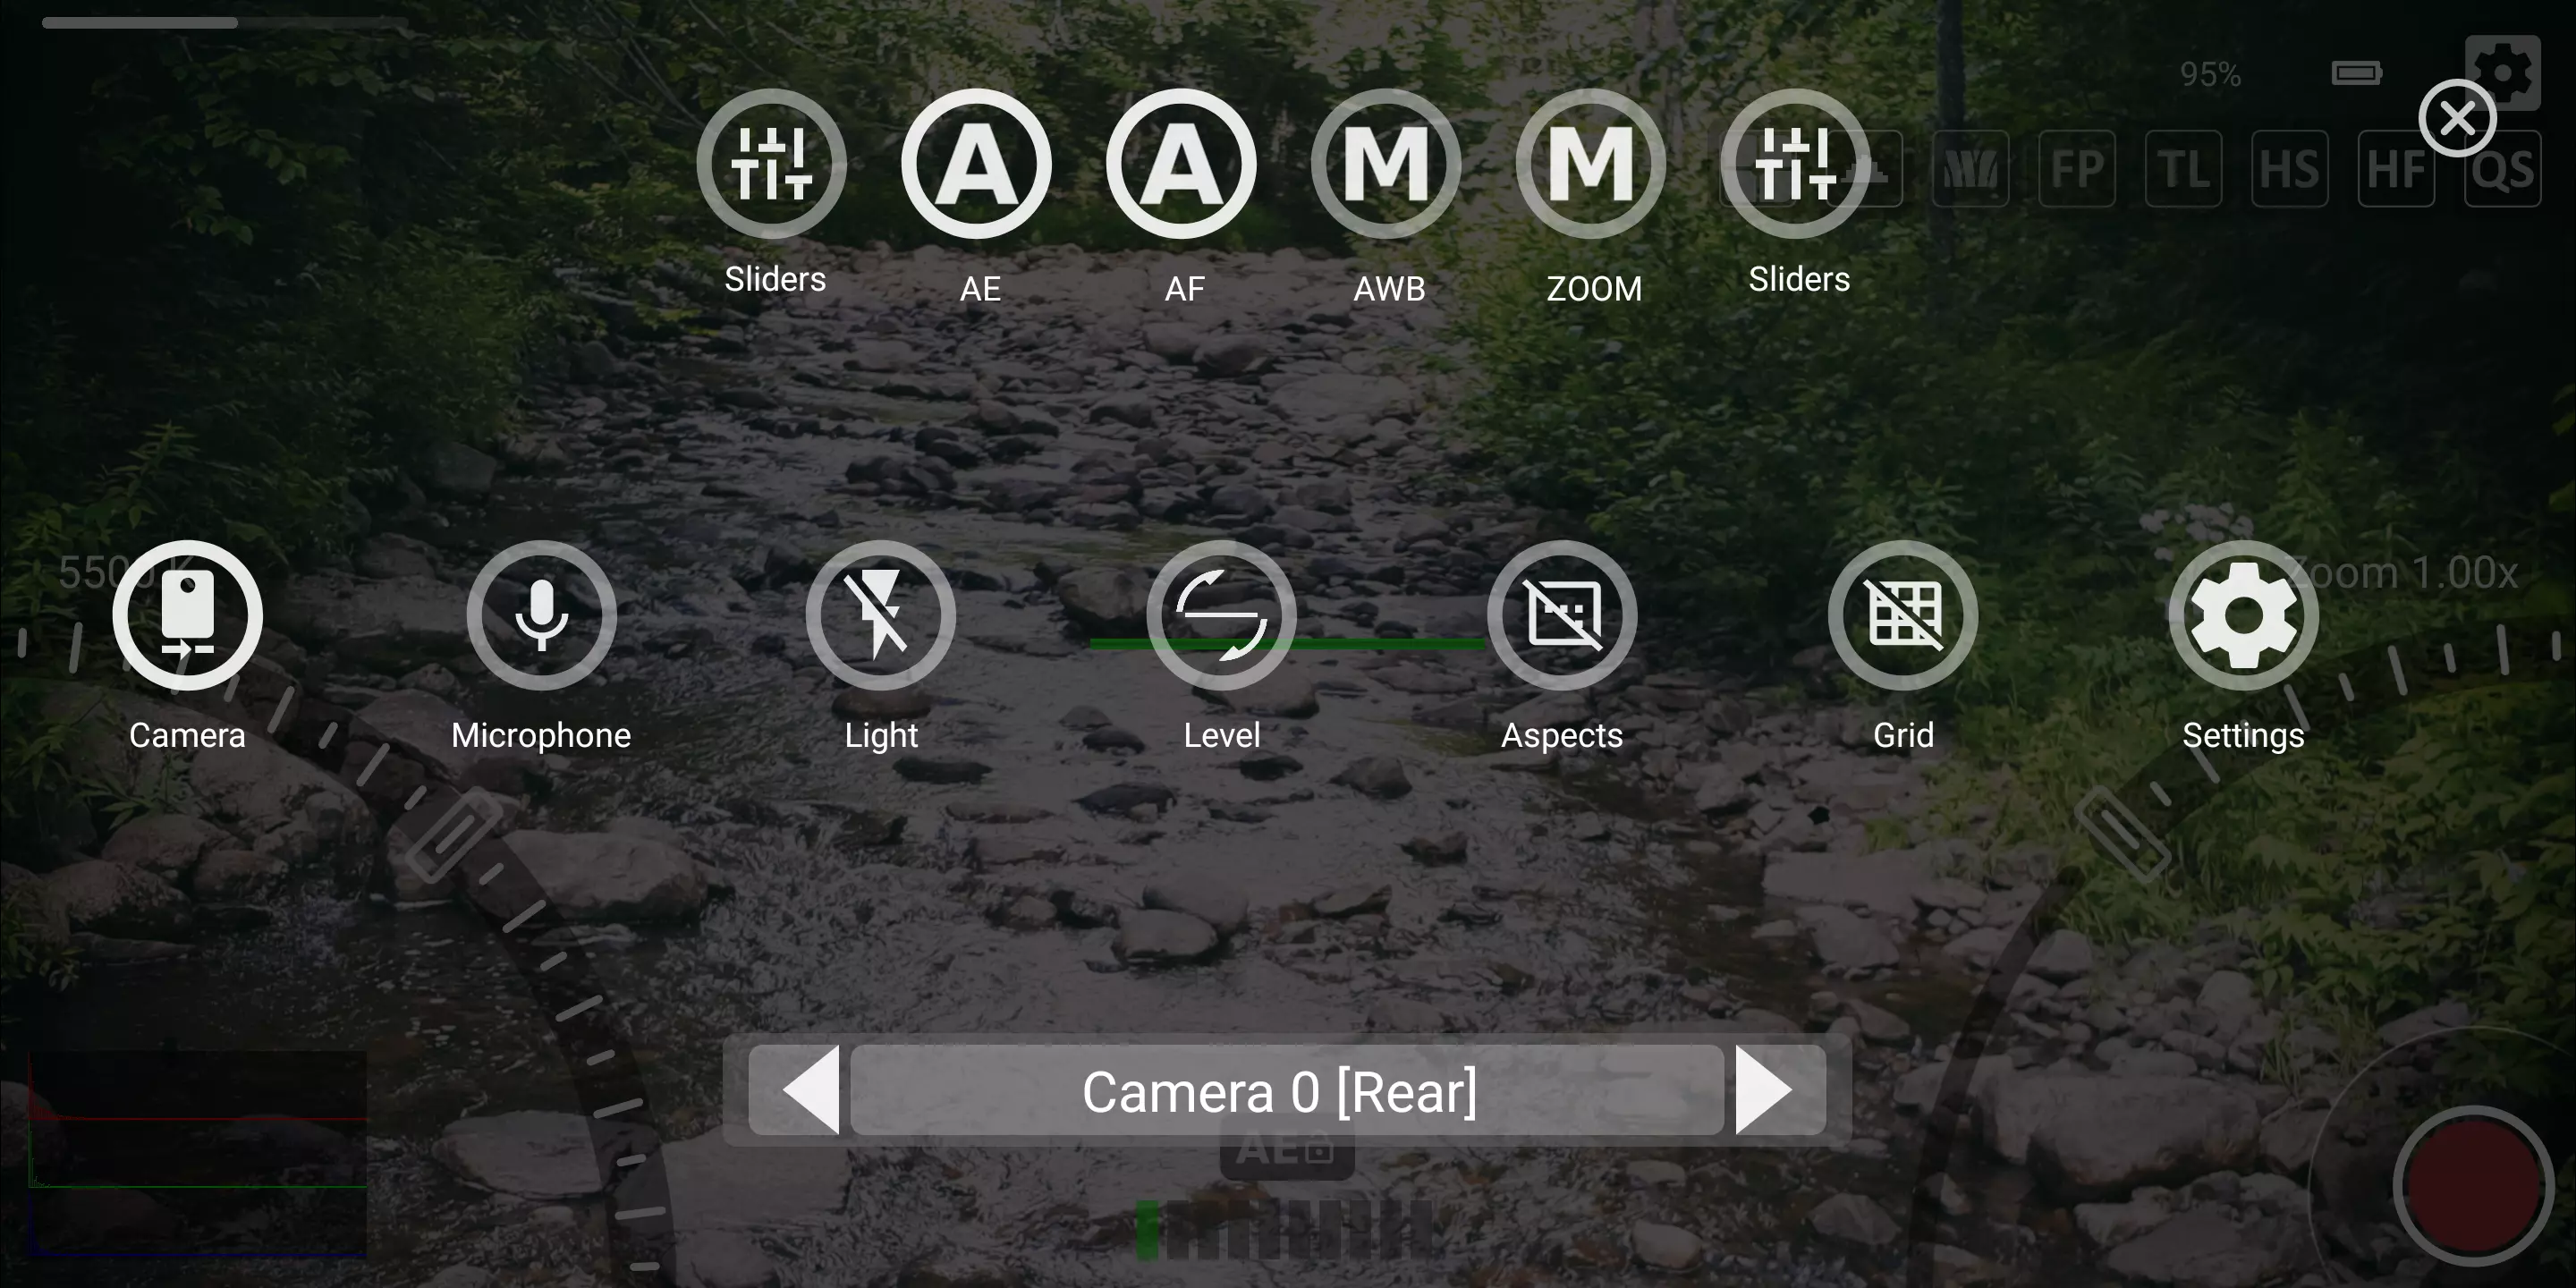
By selecting the settings button you will enter the app device settings screen. This will let you control all selectable options except for the hardware settings (the AF, AE, AWB, and Zoom buttons from the pre-settings screen).